Nigiri: the named shaping techniques
Nigiri is shaped with a fixed sequence of hand moves, and the sequences have names: te-gaeshi, “hand turns”. All of them start the same way (steps 1–8), then differ in how the piece is turned over. Kote-gaeshi is the one to learn first. Written for a right-handed cook: the left hand holds the fish and the piece, the right hand brings the rice and does most of the pressing. Start with sushi rice at about body temperature, and practise a few rice-only pieces.
Mise en place — set out in the order it goes in
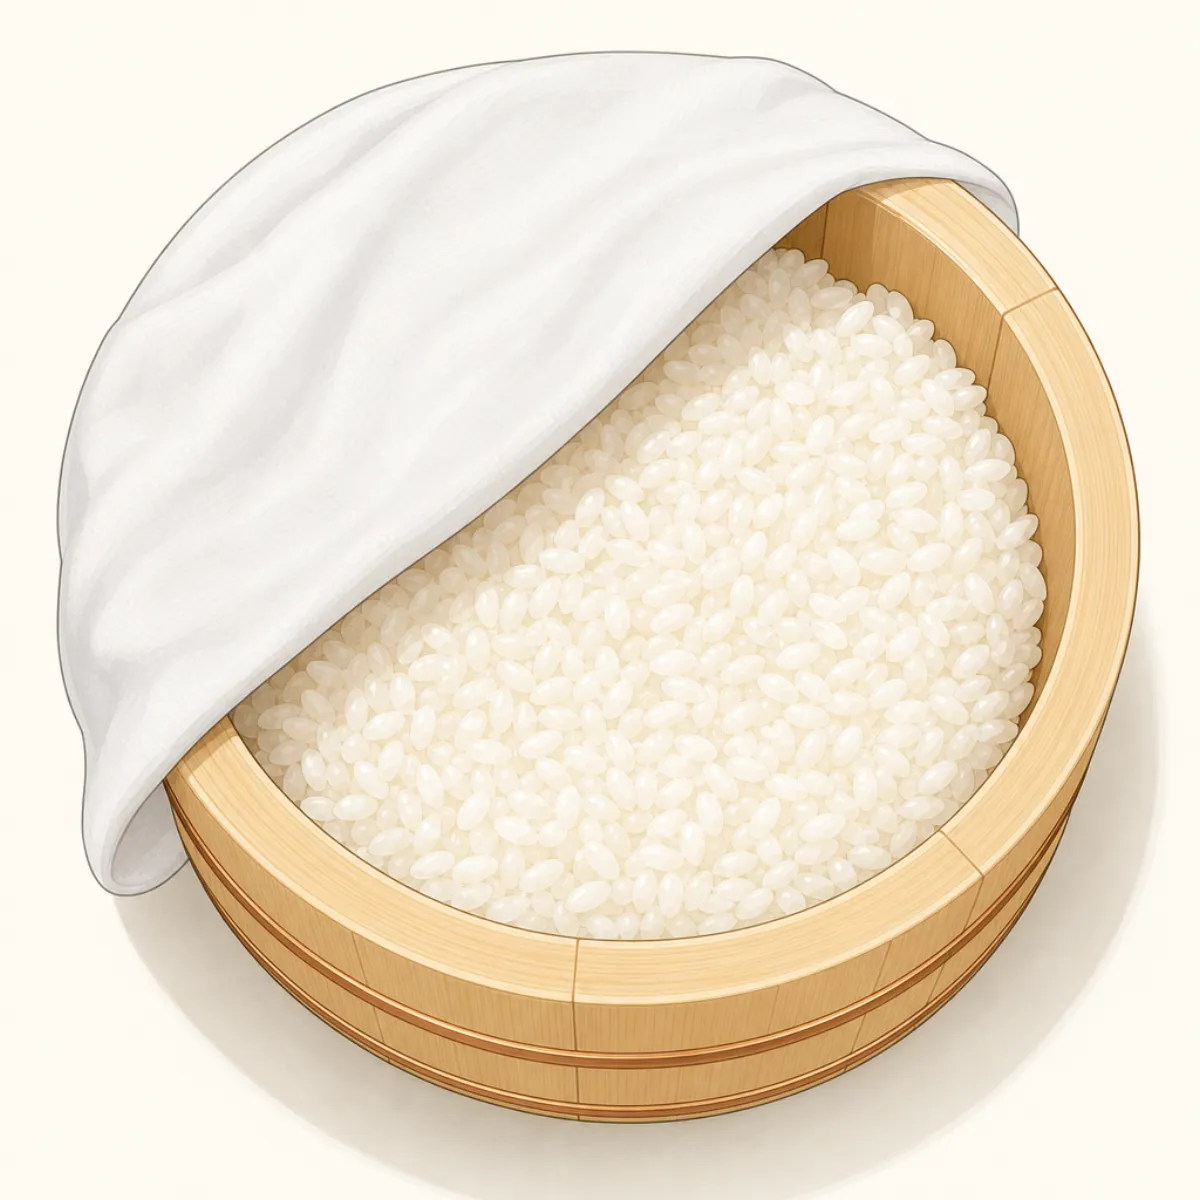 Sushi ricebody temperature, under a damp towelStep 4
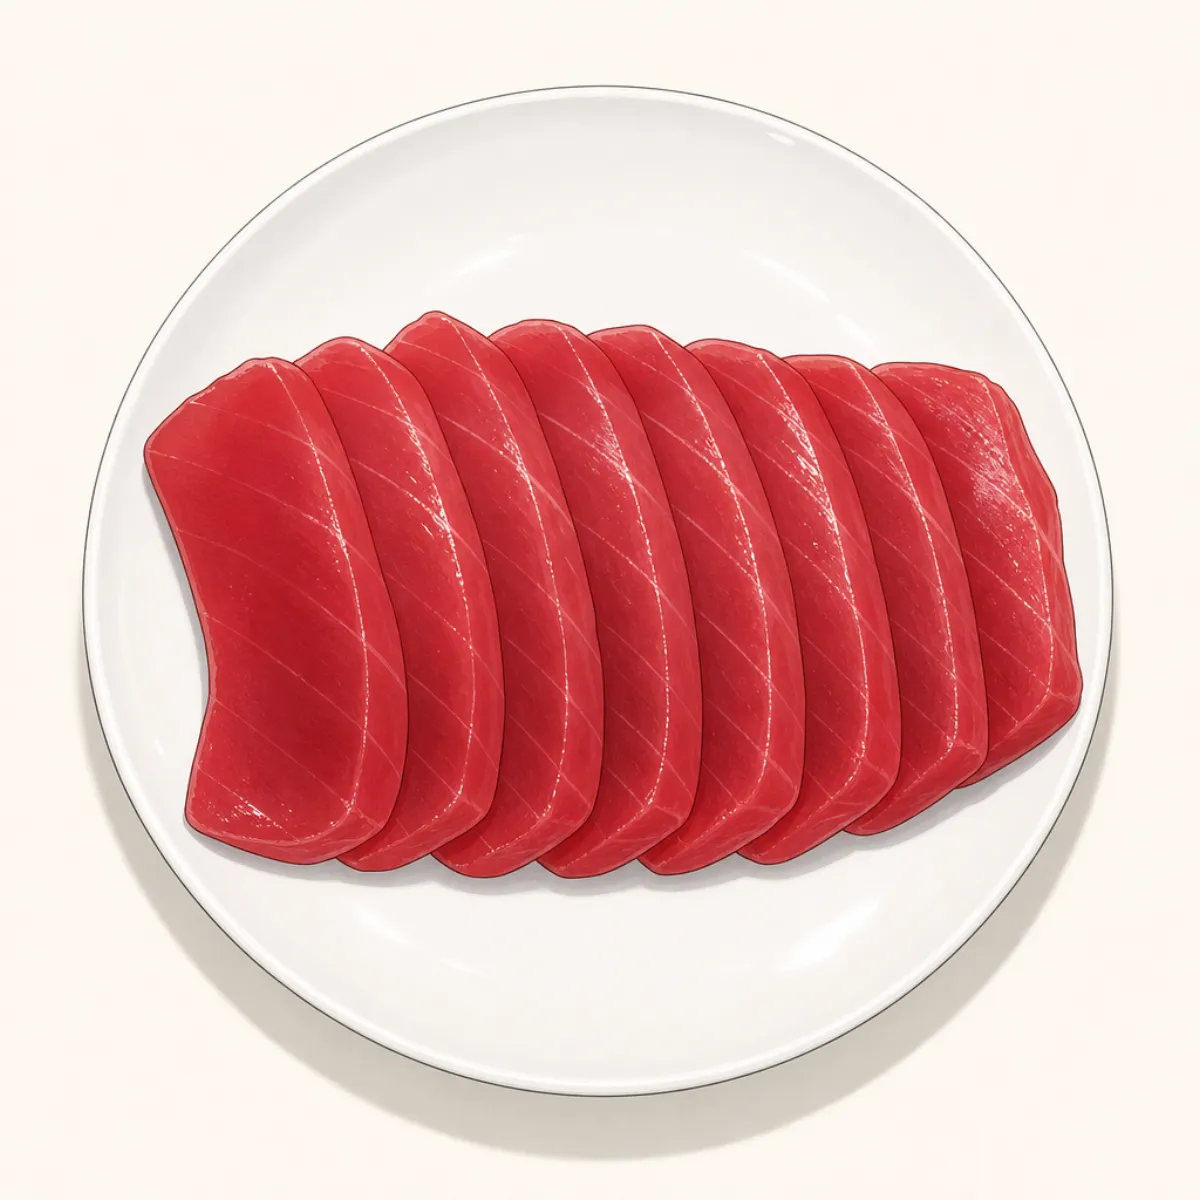 Fishsliced, 16 piecesStep 3
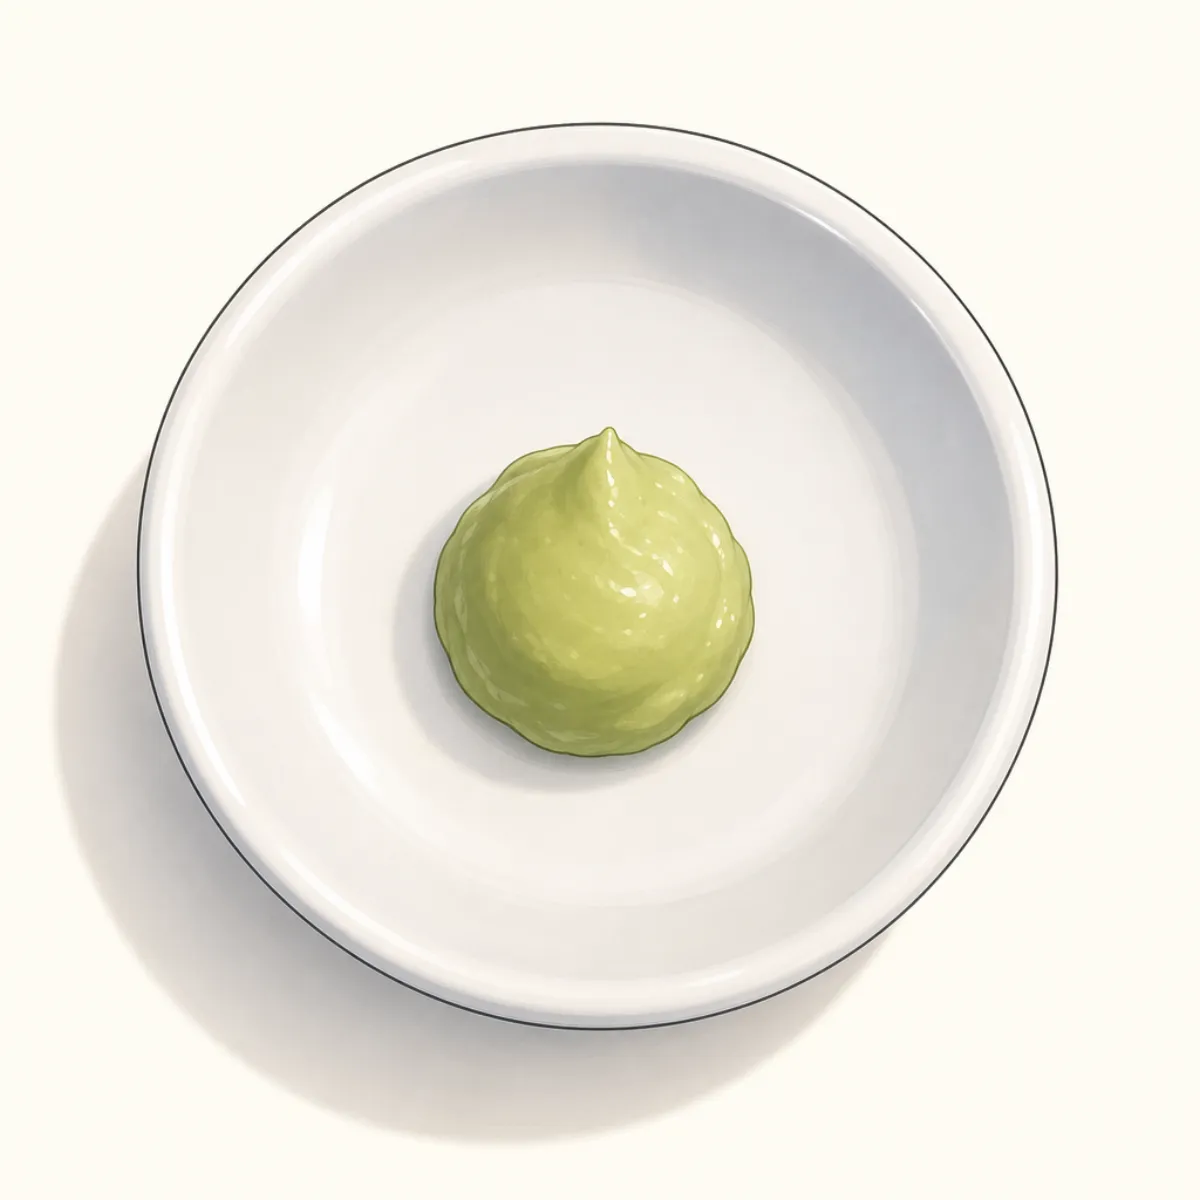 Wasabia small moundStep 5
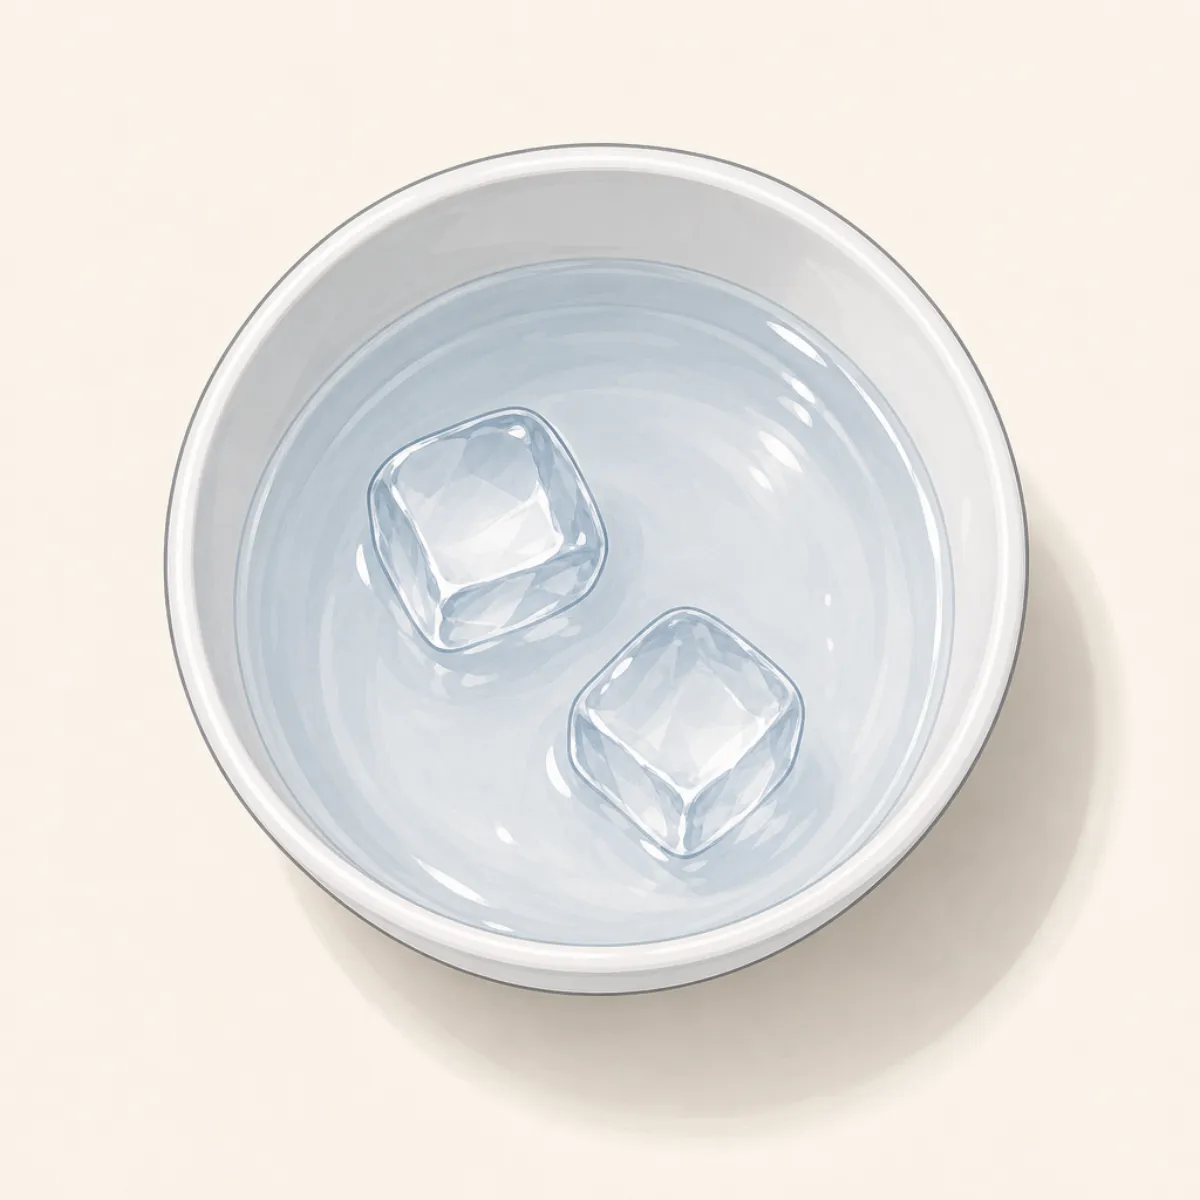 Tezucold water · rice vinegarStep 1
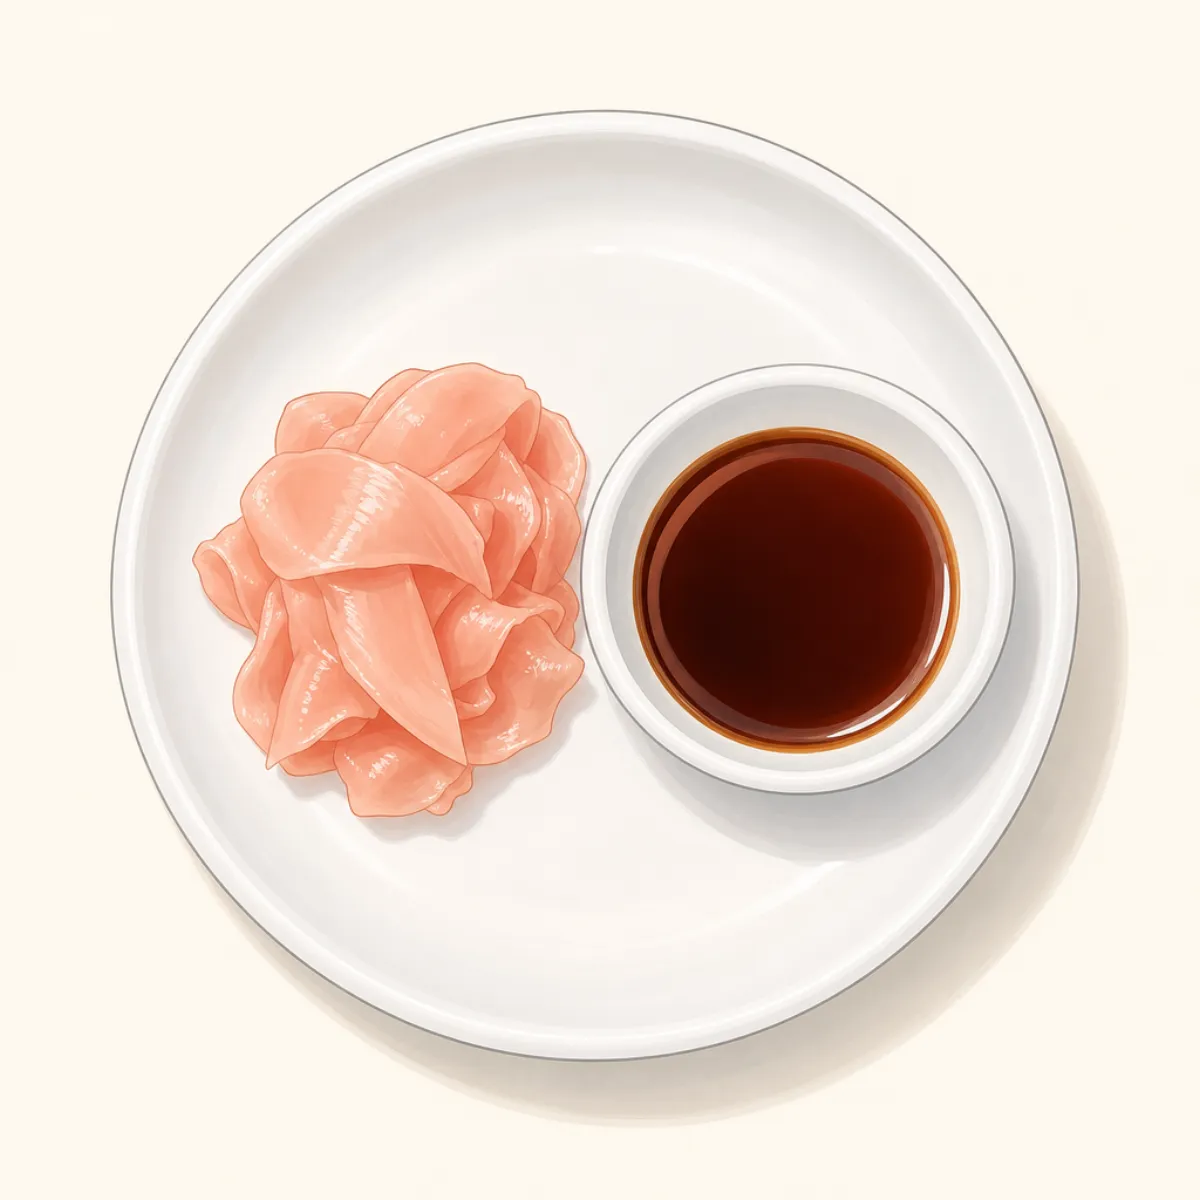 To servesoy · gingerStep 23
Prep order — what happens when, and what overlaps
Slice the fish in small batches and keep the rest of the block covered in the fridge. Work fast: warm hands warm the fish, and every extra movement packs the rice.
Step by step
Before you shape (all techniques)
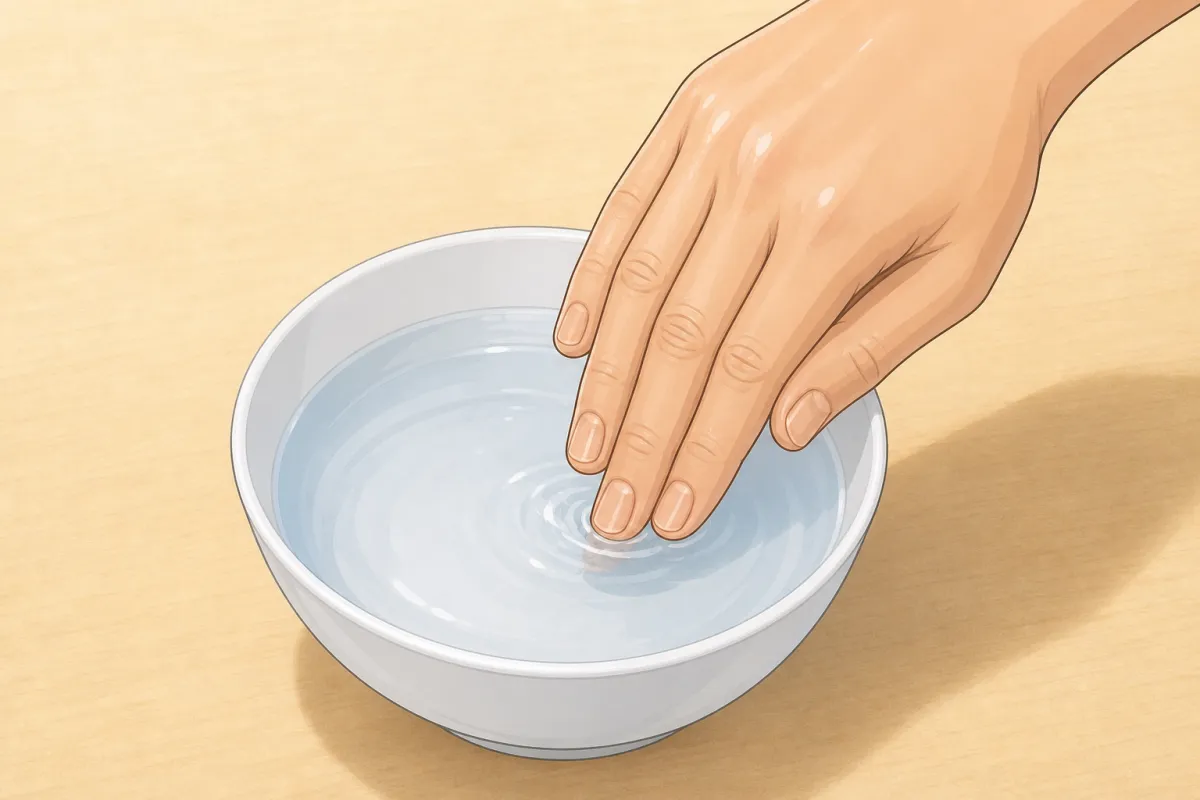
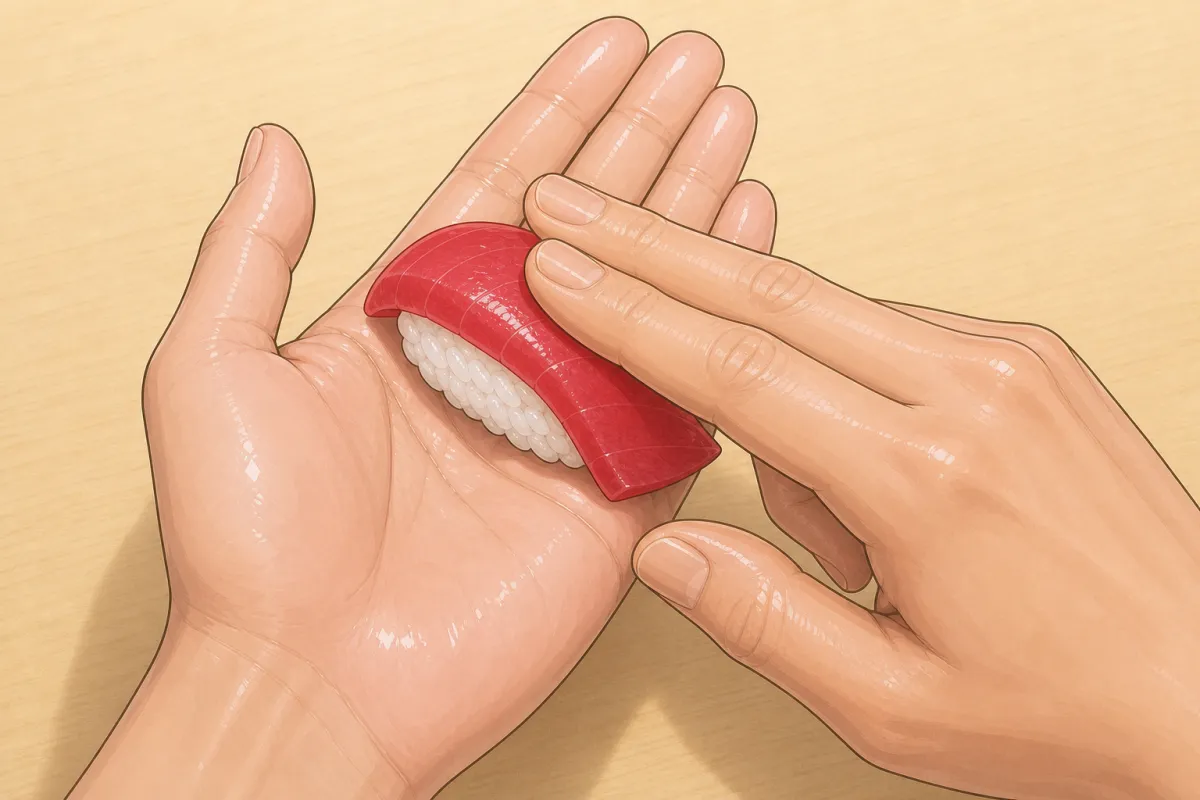
Middle finger into the tezu, to the first joint. 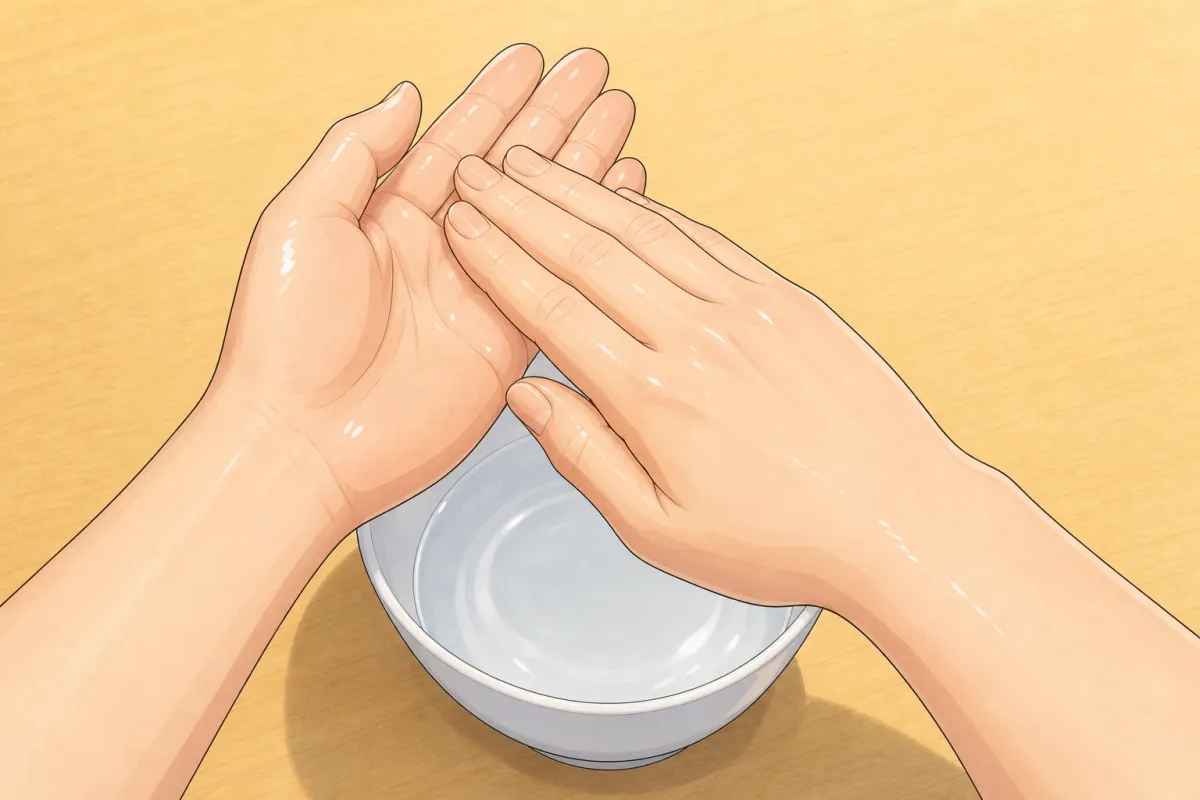
Rub it over both palms, then clap off the excess. 1Tezu: wet the hands
5 sFor this step
- Water (tezu)250 ml
- Rice vinegar (tezu)1 tbsp
- Mix the cold water and rice vinegar in a small bowl.
- Dip the right middle finger to the first joint and rub the water over both palms.
- Clap off the excess — one hand a loose fist, one open. Damp, not wet: too much water and the rice falls apart.
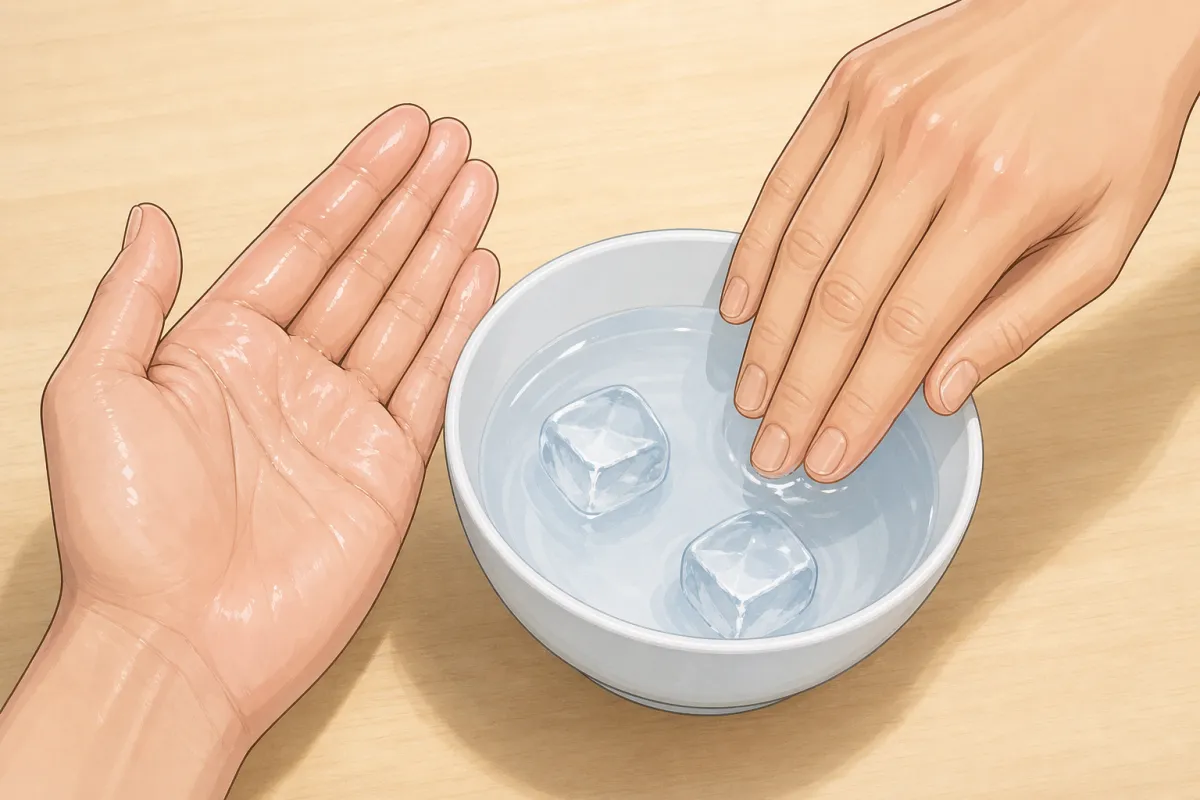
Should look like this 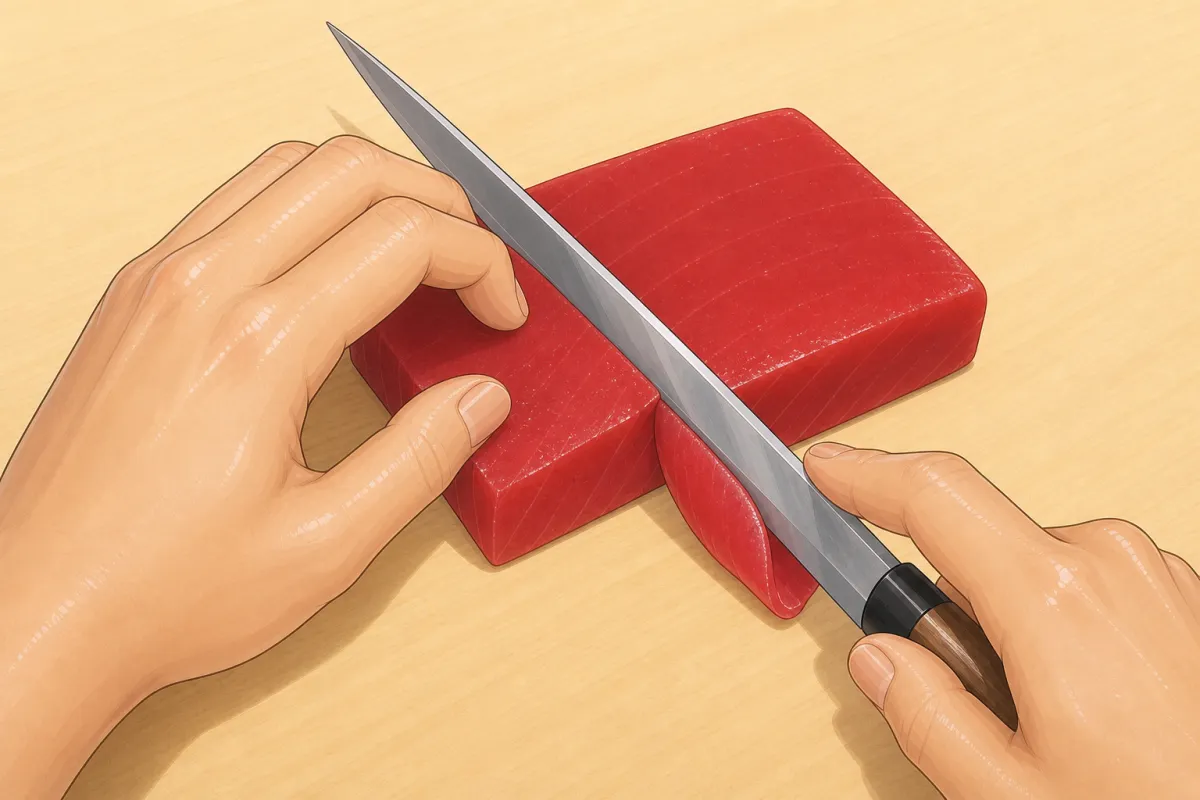
One long pull towards you, knife tilted 30–45°. 2Slice the fish
~10 minFor this step
- Sashimi-grade tuna or salmon, a block (saku)~200 g (16 slices)
- Cut across the grain (the faint white lines).
- Tilt the knife 30–45°, set the heel on the far edge and draw it towards you in one long pull — don't saw.
- Slices about 7–8 cm long, 3 cm wide and 3–5 mm thick, about 14 g each.
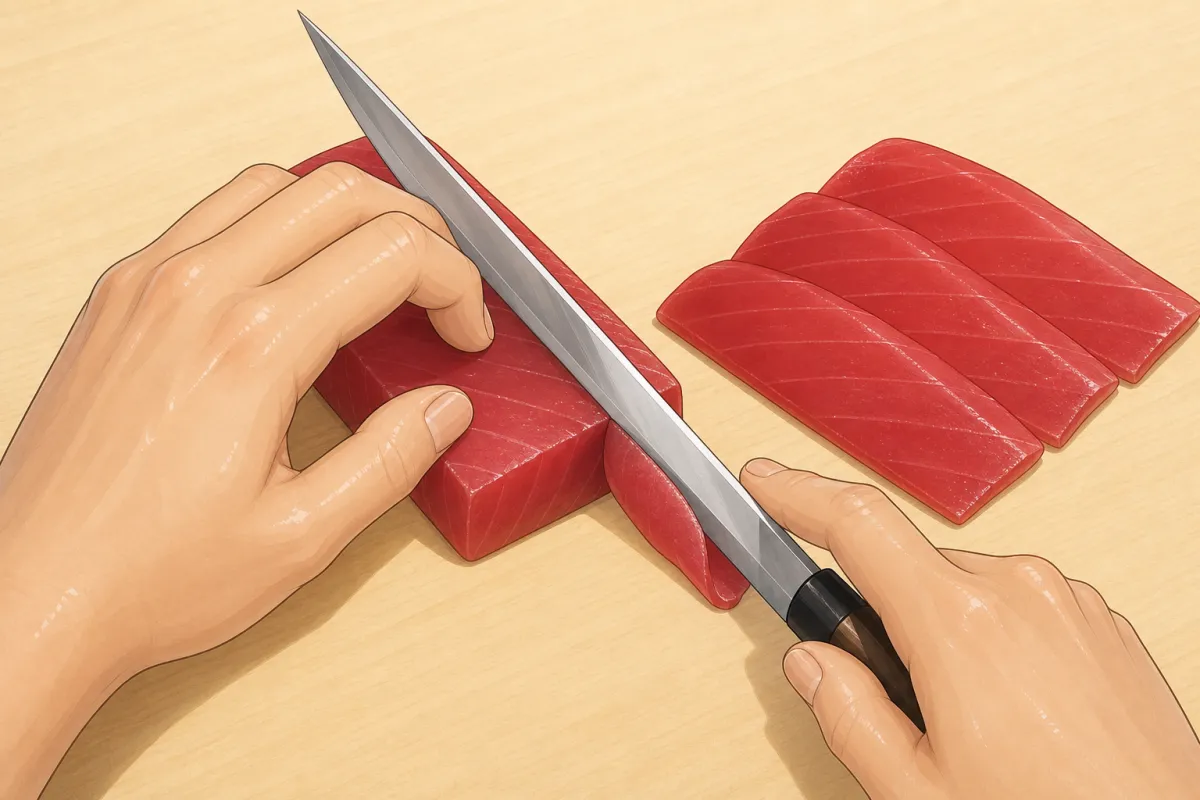
Should look like this 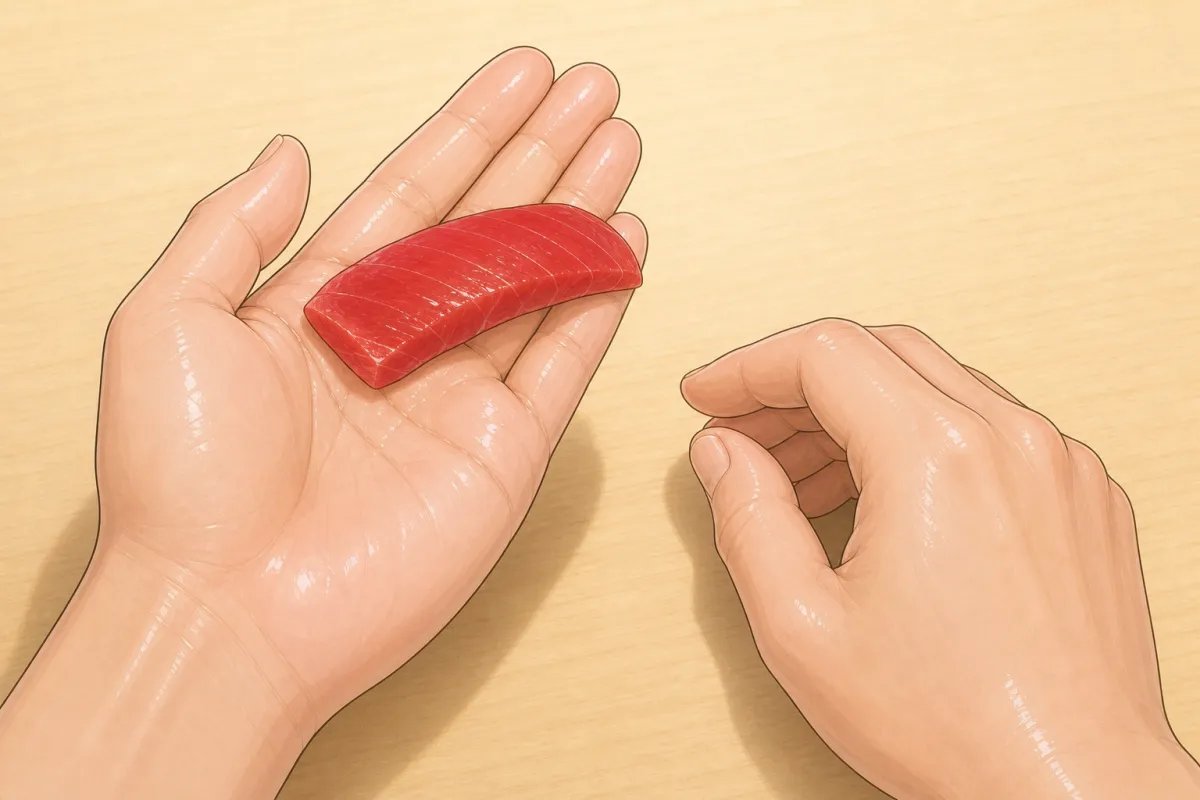
3Fish onto the left fingers
2 s- Lay a slice across the inner side of the left fingers, one end near the finger roots — not in the middle of the palm.
- The neat cut face goes down, against the fingers; the side that will get the wasabi faces up.
- The rice will sit over the second and third joints of the fingers.
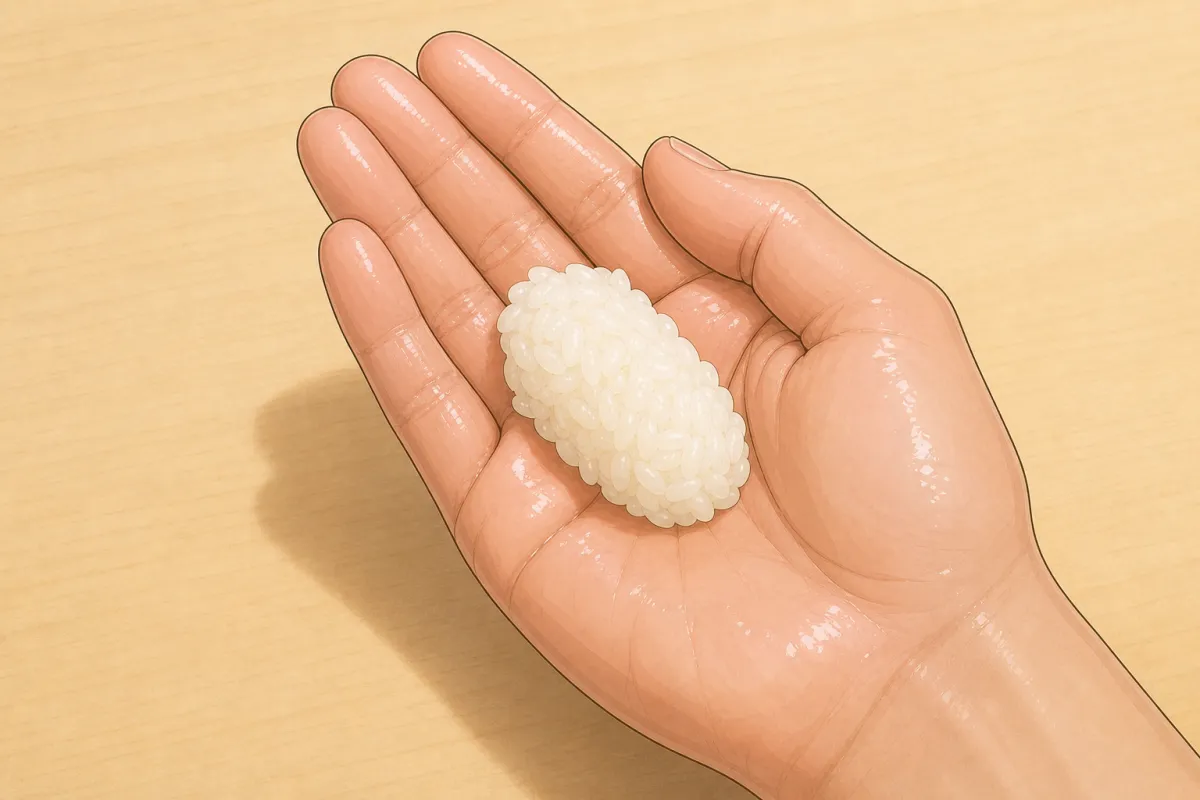
Take the rice with the fingertips; round it loosely, don't squeeze. 4Take the rice (shari)
3 sFor this step
- Sushi rice~300 g (18–20 g each)
- With the right fingertips, take about 18–20 g of rice from the tub.
- Round it loosely into an oblong in the cupped right fingers — no squeezing.
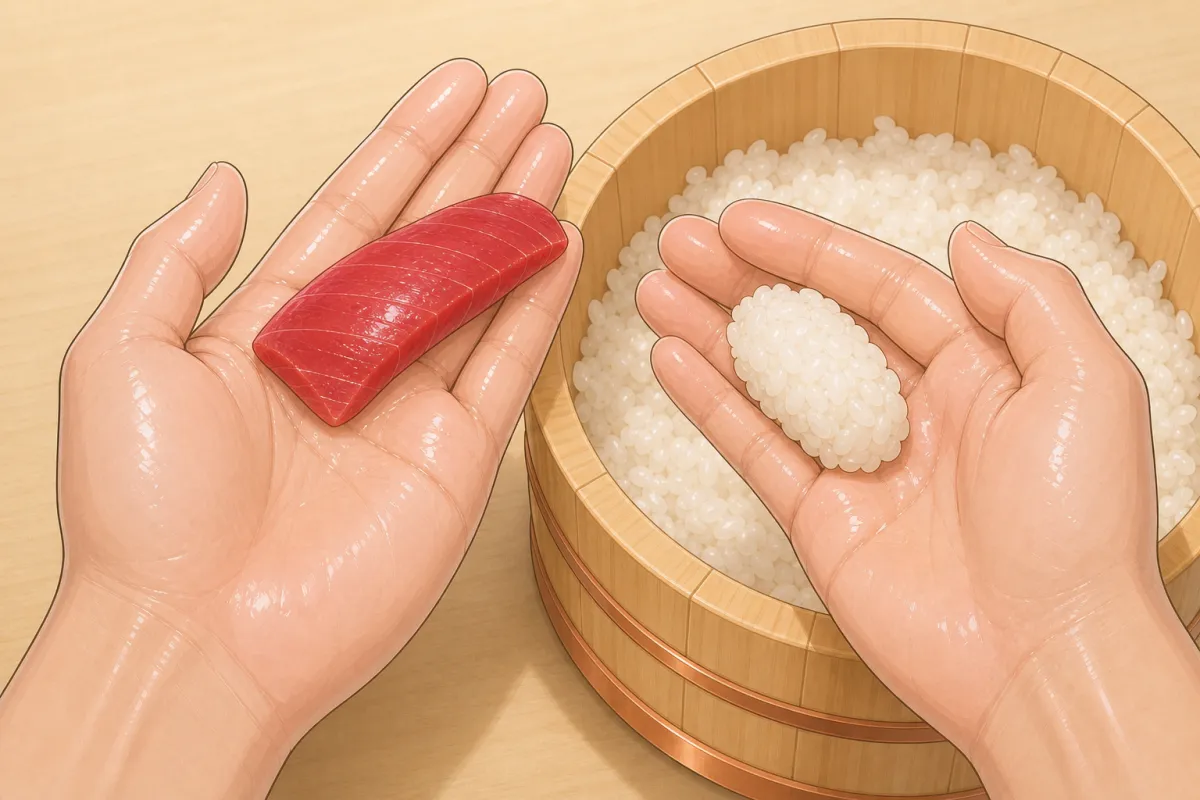
Should look like this 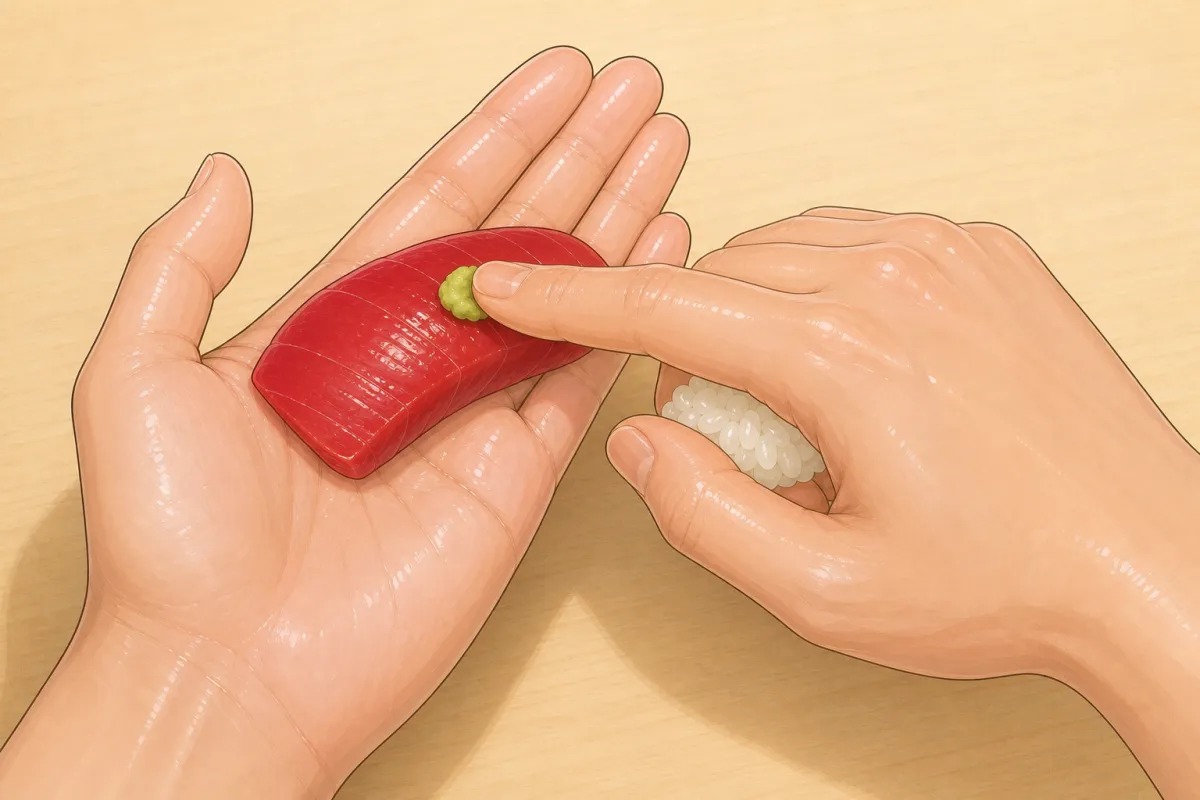
5Wasabi
2 sFor this step
- Wasabia pea-sized dab per piece
Still cradling the rice with the other right fingers, dab a pea of wasabi on the middle of the fish with the right index finger.
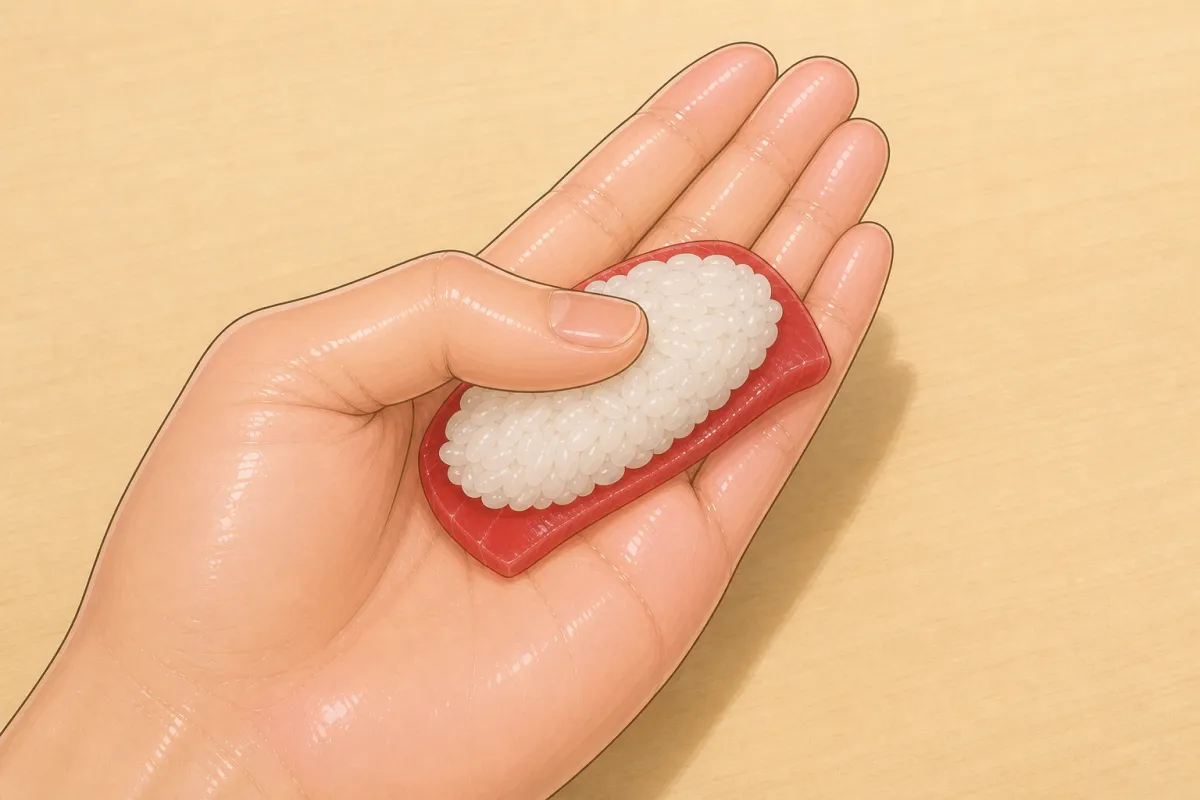
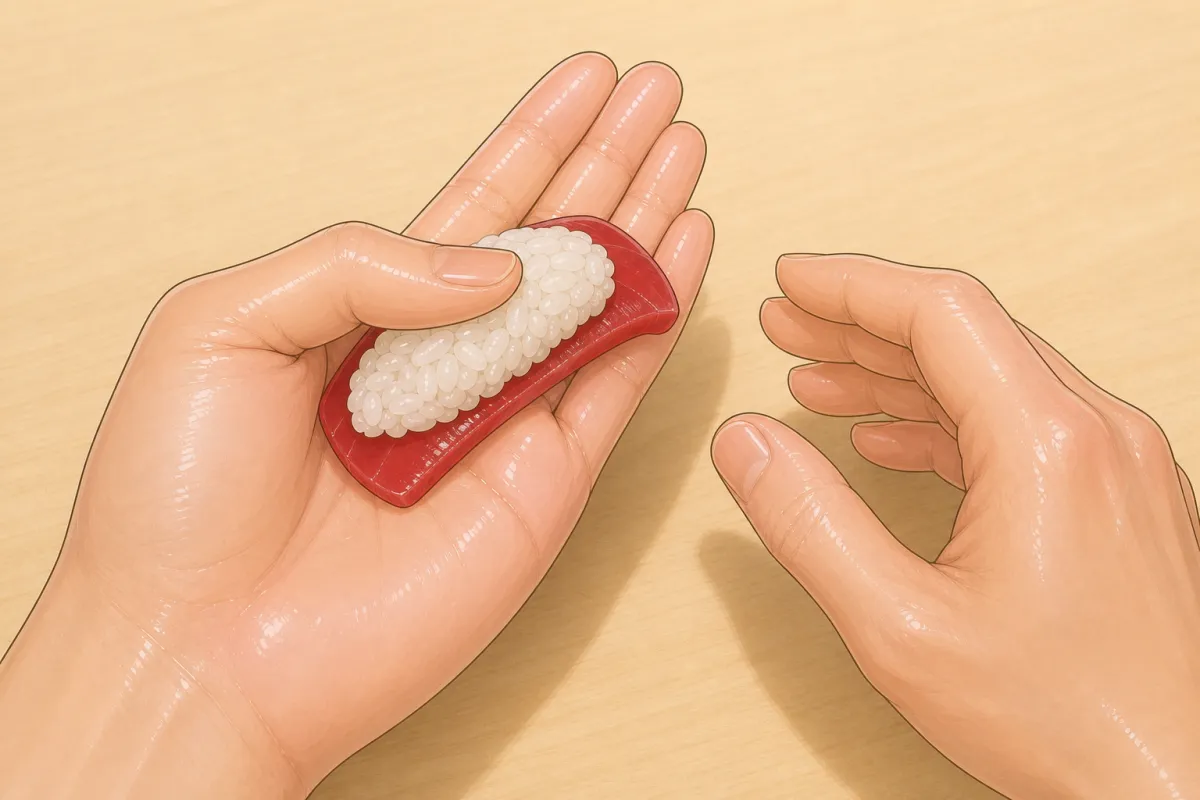
The left thumb spreads the rice over the fish. 6Rice onto the fish
2 s- Set the rice on the fish. The left hand cups a little so the fish bends up to the rice.
- The left thumb, raised slightly, flattens and spreads the rice over the fish.
Should look like this 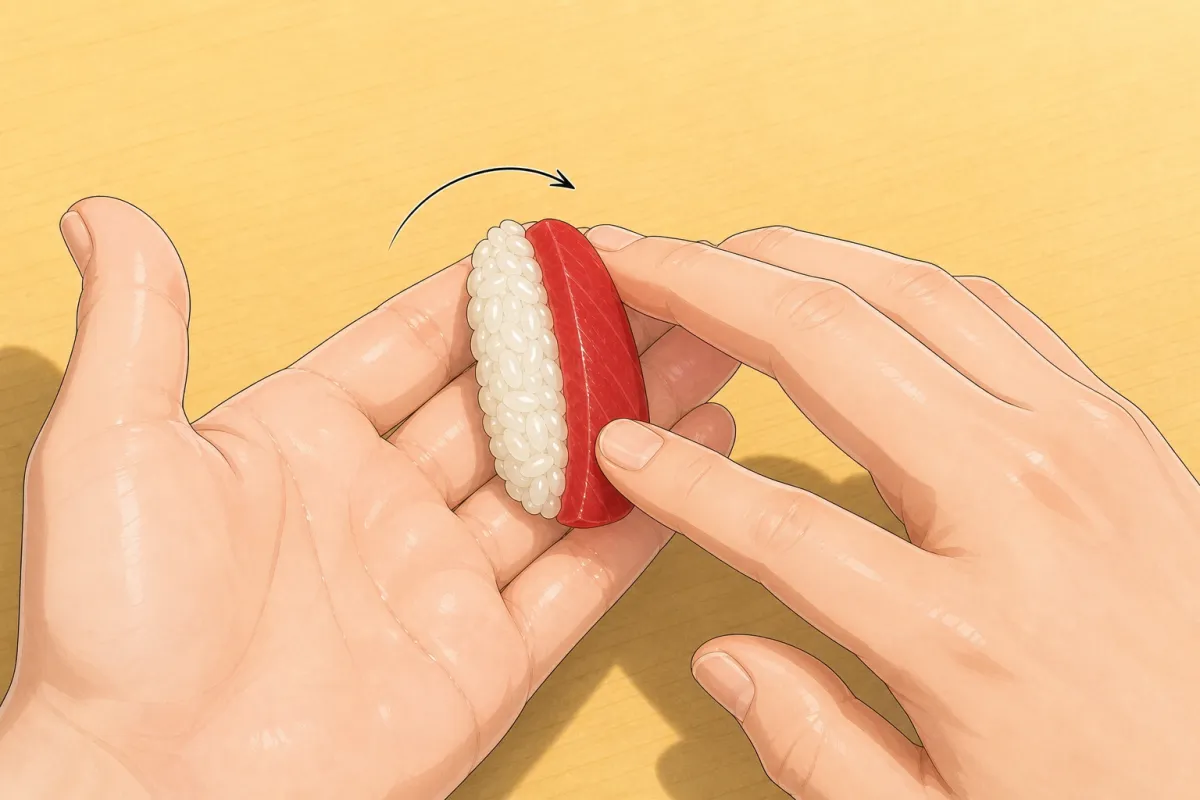
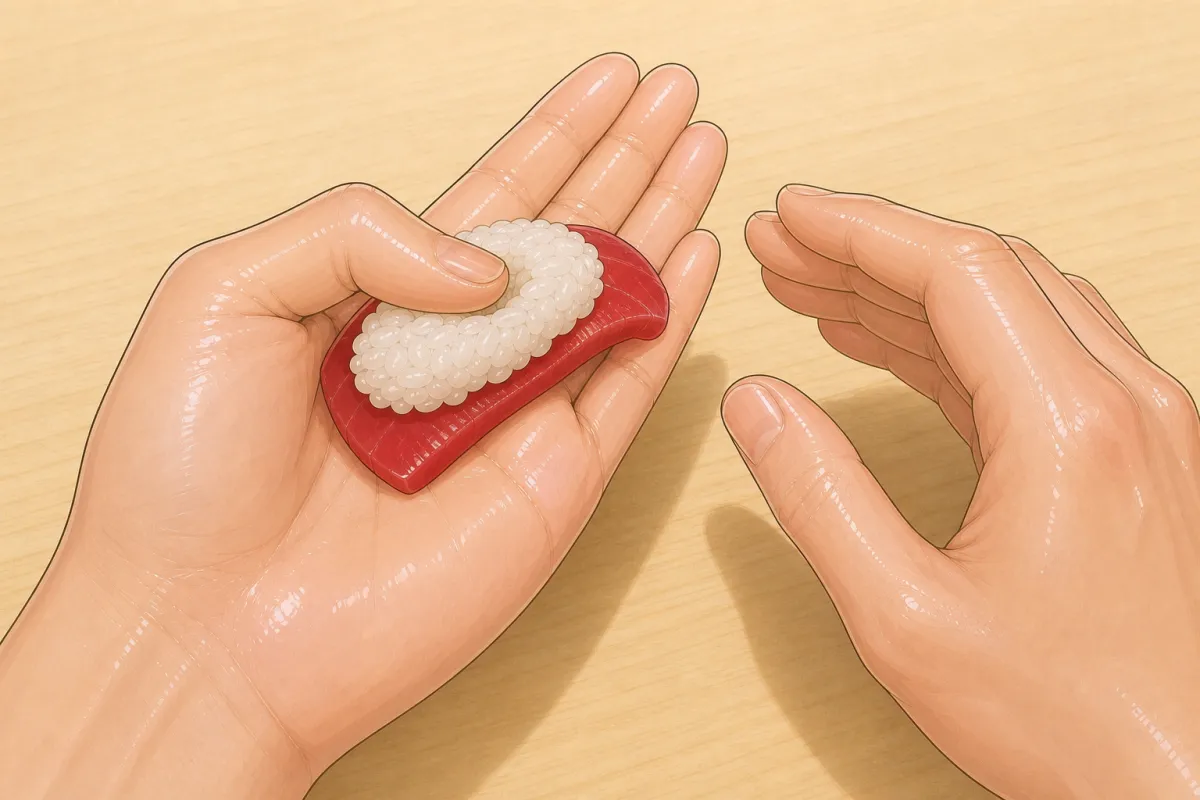
The thumb dent: straight down into the middle. 7The thumb dent
1 s- The left thumb pushes a small hollow into the middle of the rice, straight down.
- It keeps air inside so the rice falls apart in the mouth: firm outside, airy inside.
Should look like this 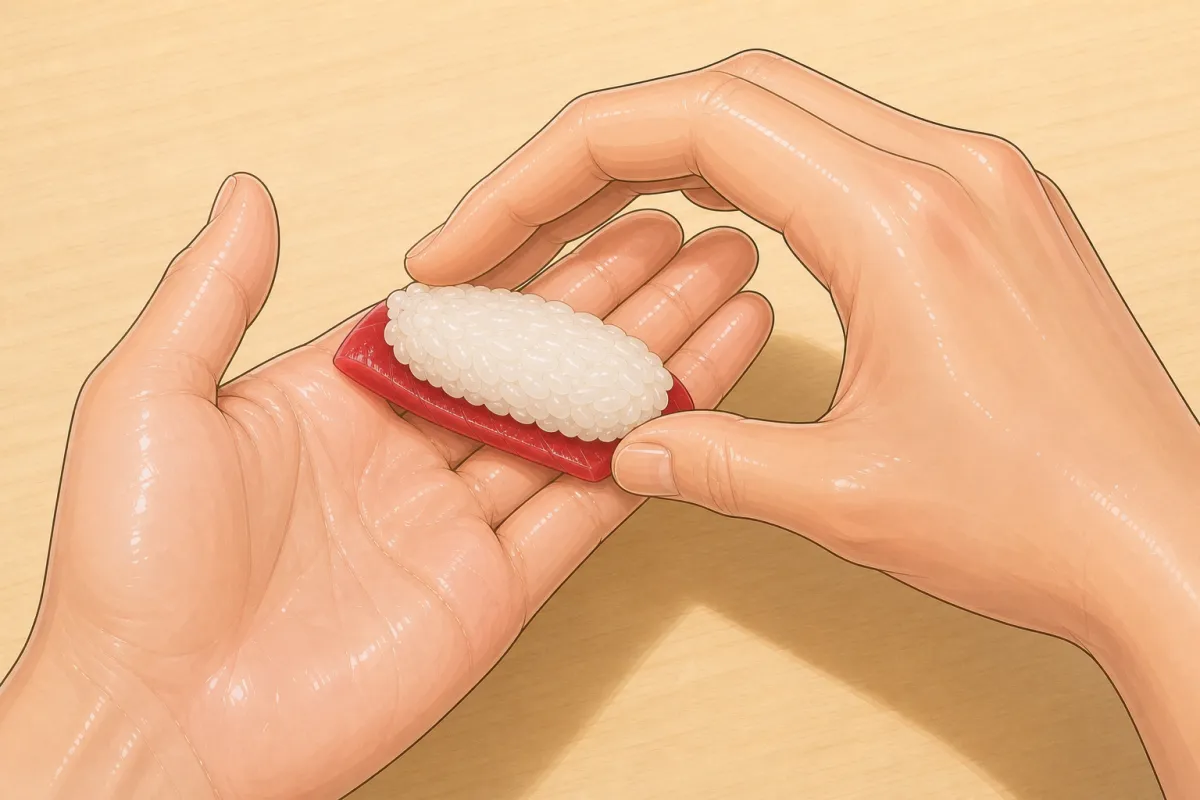
Right thumb and index press the two short ends. 8Basic shape
2 s- The right index finger and thumb press the two short ends of the rice.
- Then they press the long sides lightly — a rough rectangle.
- Fish still underneath, rice on top, lying across the left fingers.
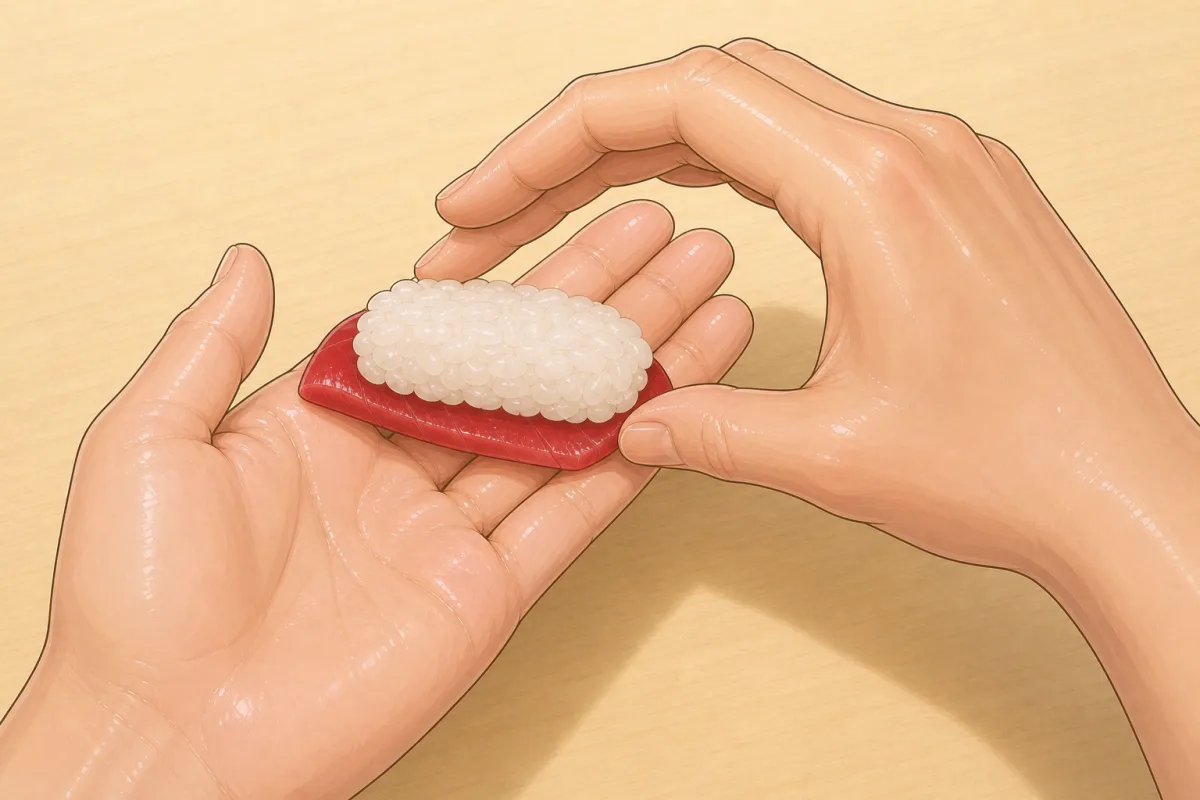
Should look like this Kote-gaeshi — the standard
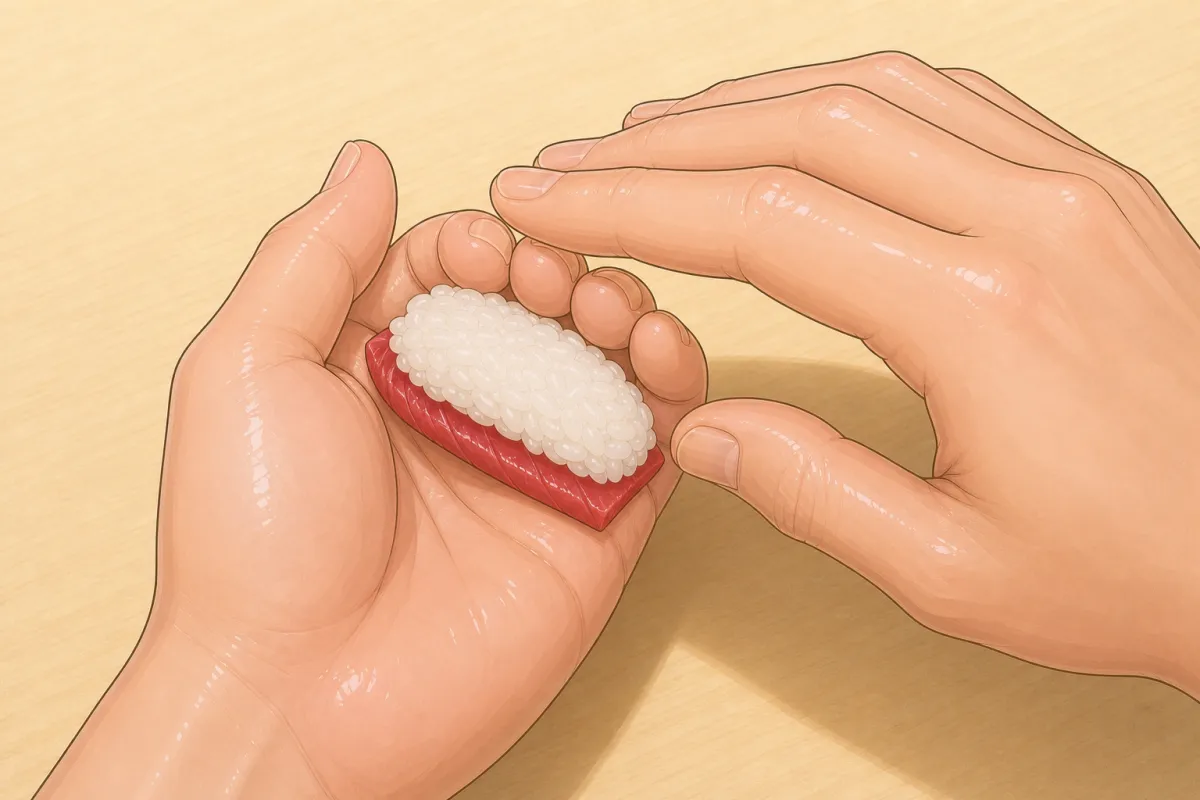
9Enclose
1 sCurl the left fingertips up around the piece (still fish down, rice up); the right hand hovers lightly over the top.
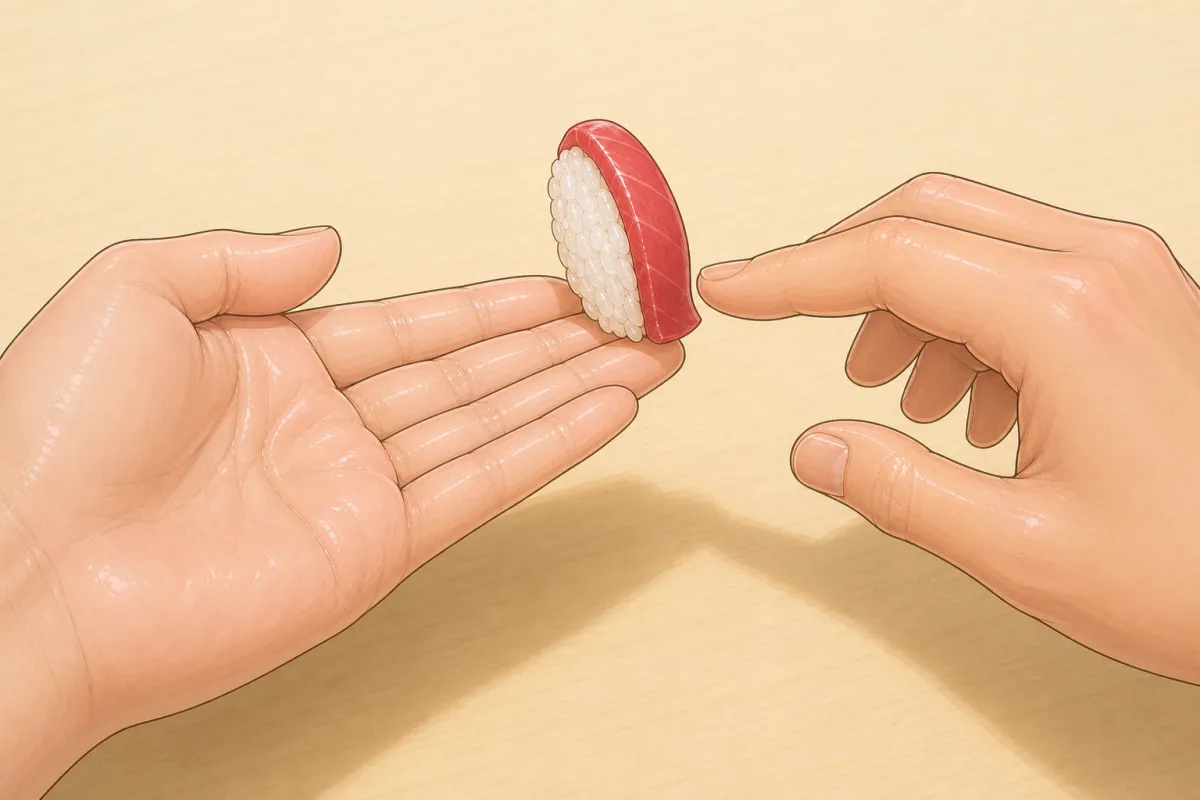
Left fingers open: the piece rolls forward over the fingertips. 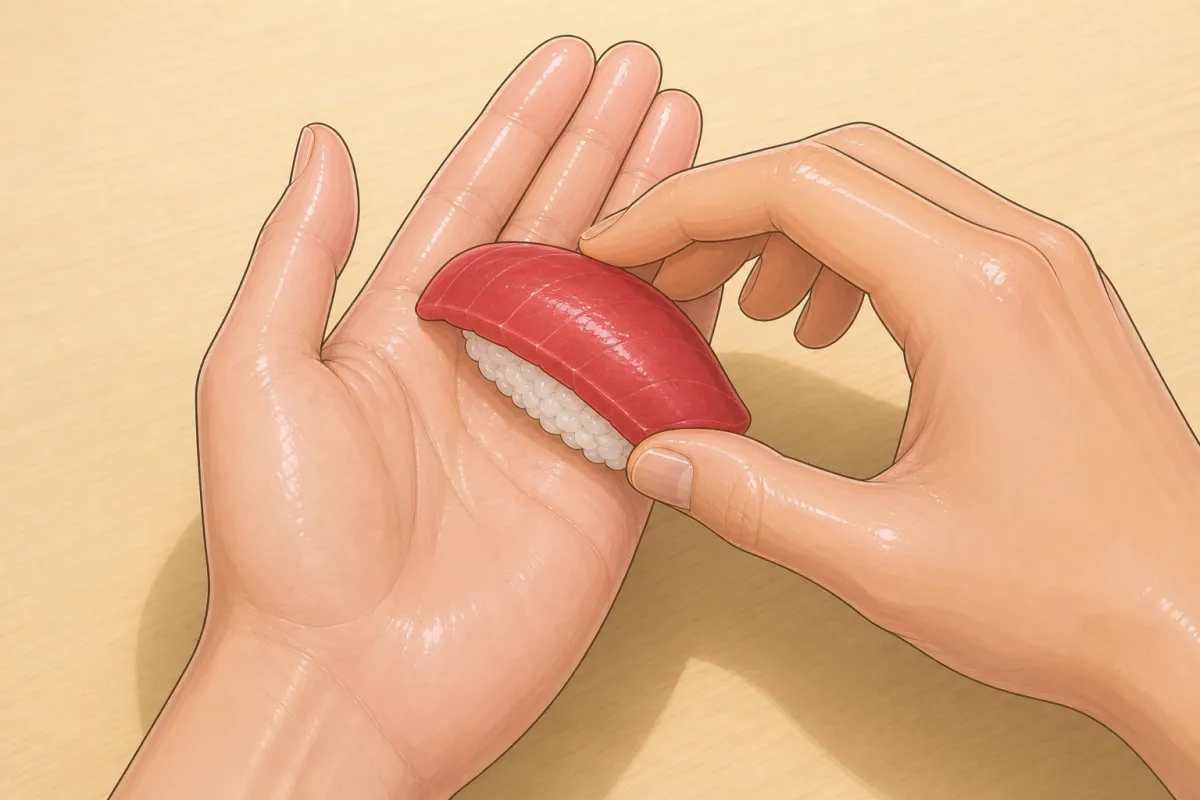
The right index and thumb catch it — fish up. 10Roll it over
1 s- Open and straighten the left fingers: the piece rolls forward over the fingertips, away from you, and turns over — it ends fish up, back on the left fingers.
- The right index finger and thumb catch it and guide it back down.
- It rolls around its long side (inferred from where the next presses land — no source states the axis).
Should look like this 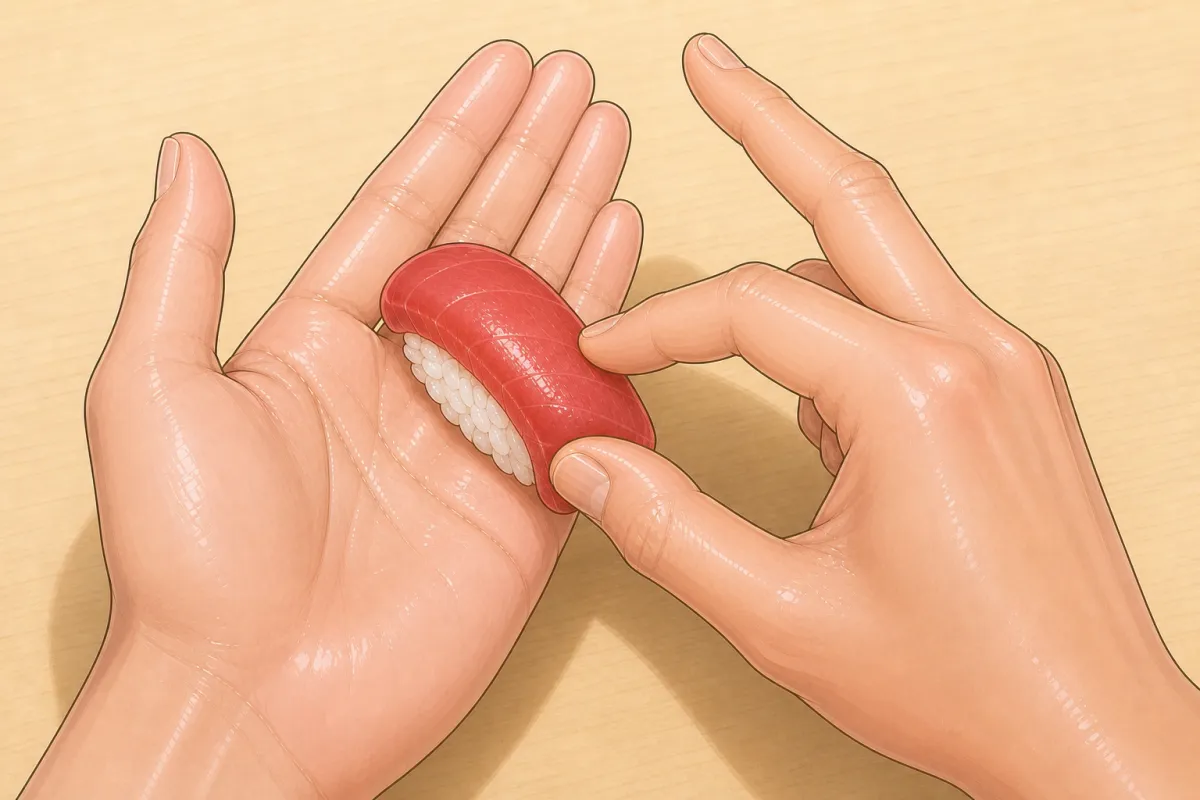
Right thumb and middle finger pinch the long sides. 11Squeeze the sides
1 sThe right thumb and middle finger pinch the two long sides inward, wrapping the fish around the rice; the left hand cradles the piece.
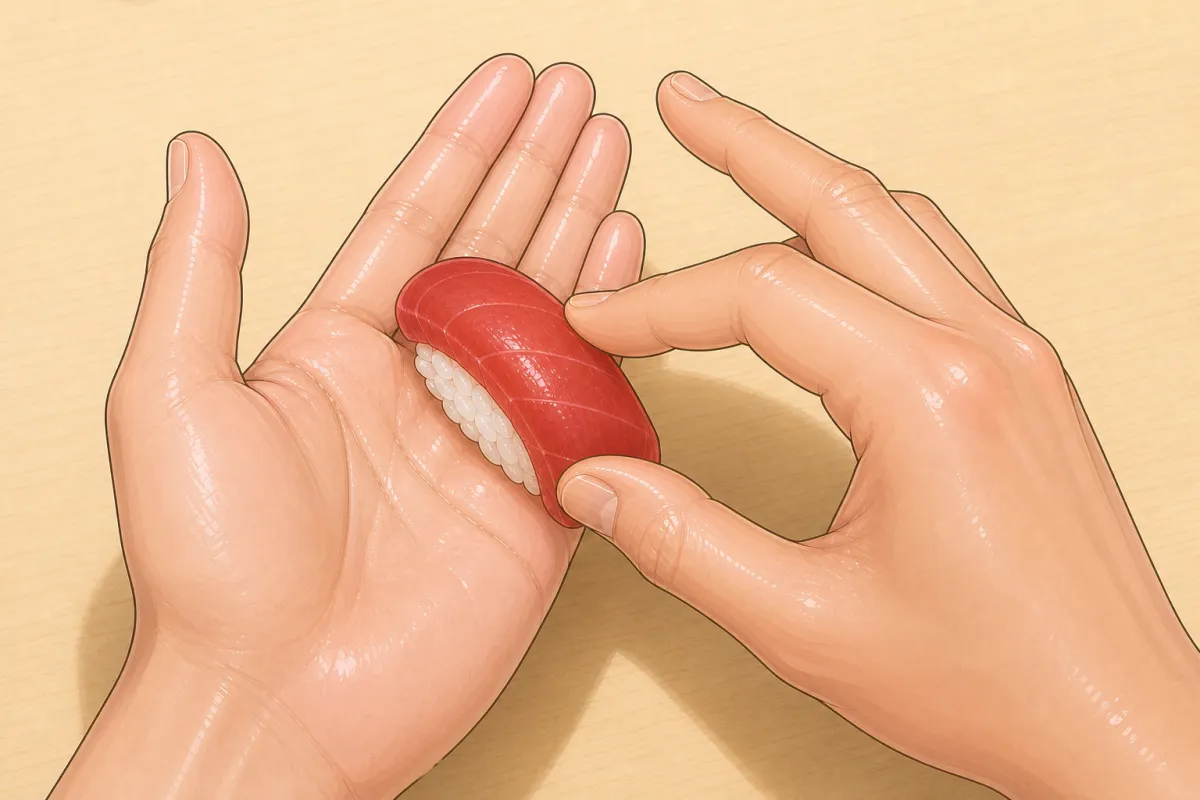
Should look like this 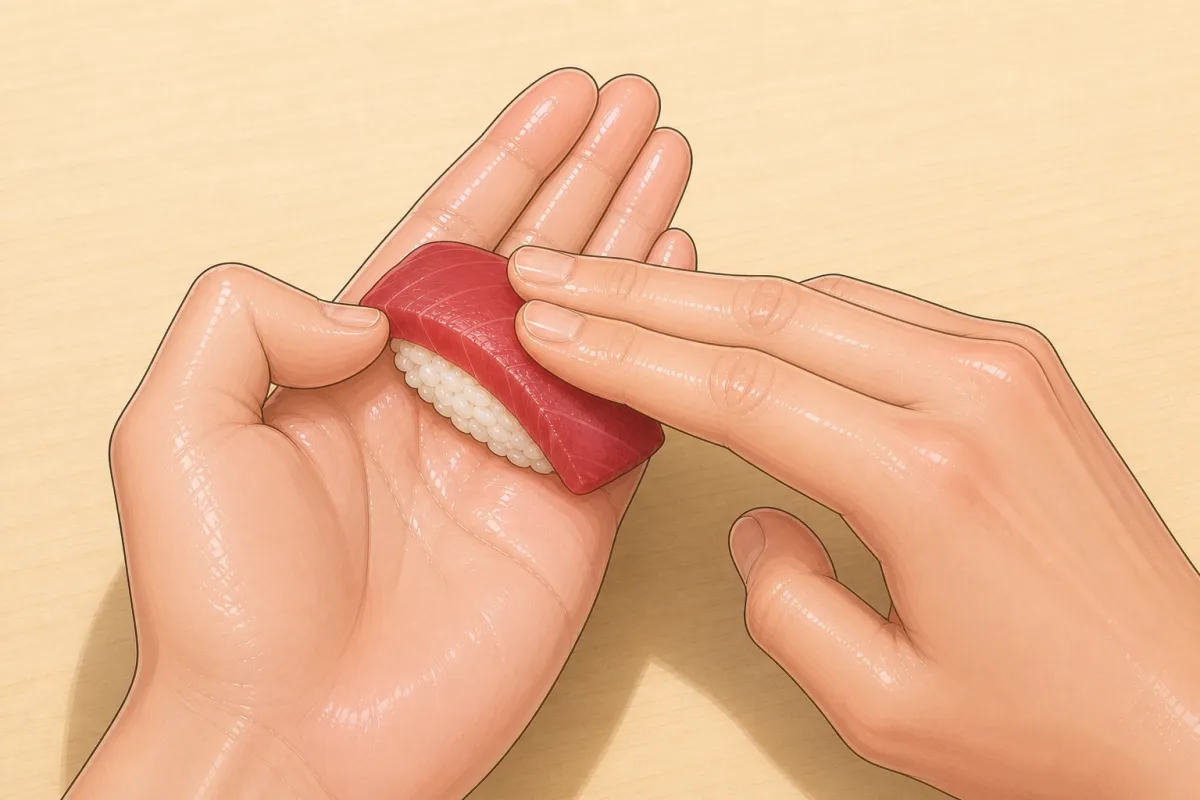
Left thumb squares the end; right fingers rest on top like a lid. 12Square the end, cap the top
1 s- The left thumb presses the near short end square.
- At the same time the right index and middle fingers rest on top of the fish like a lid — resting, not pushing down. The pressure comes from the left hand lifting into them.
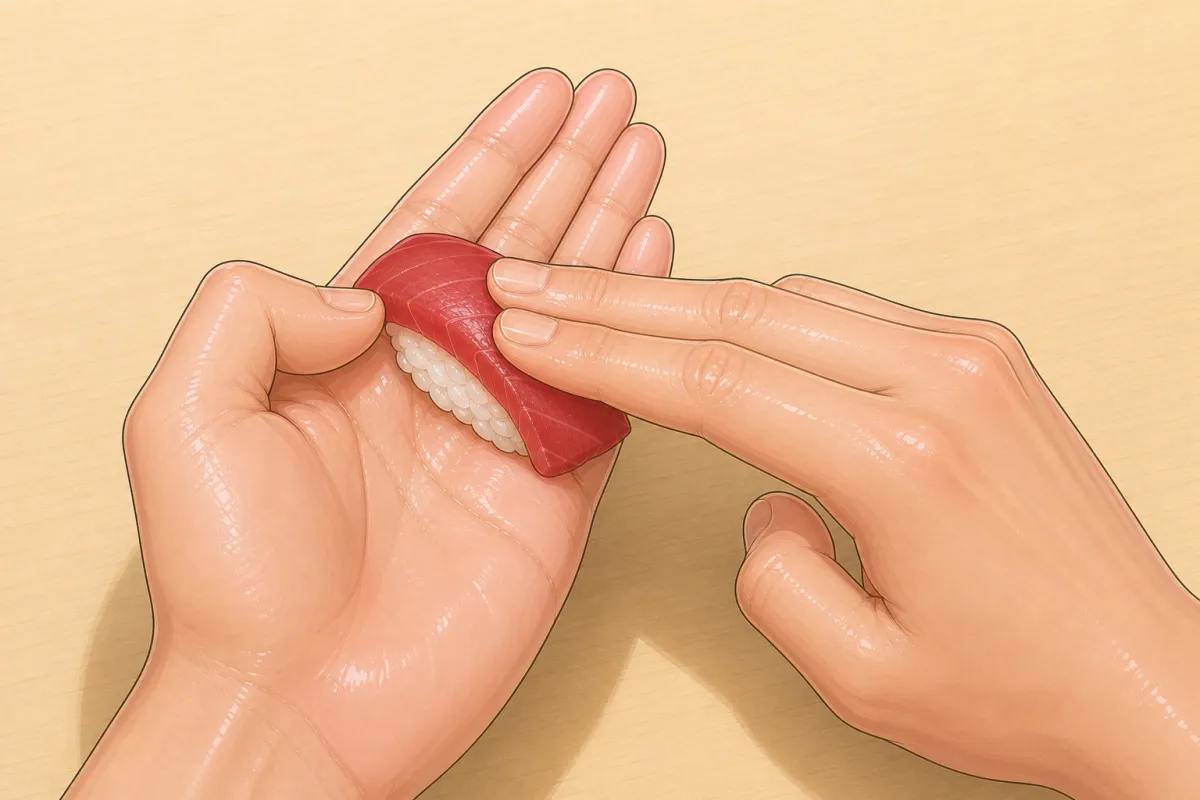
Should look like this 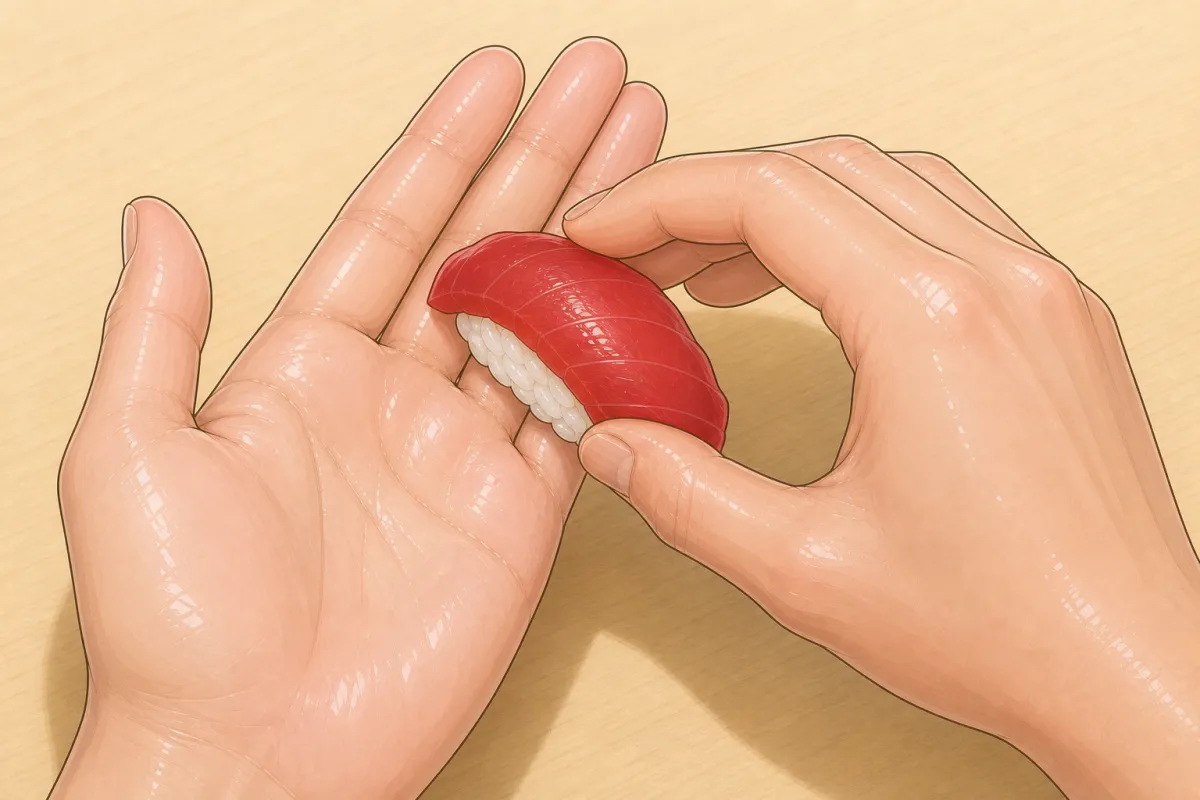
Turn it 180° clockwise on the left fingers. 13Half-turn
1 sThe right index finger and thumb pick the piece up by its sides and turn it 180° clockwise (seen from above) on the left fingers, so the two ends swap.
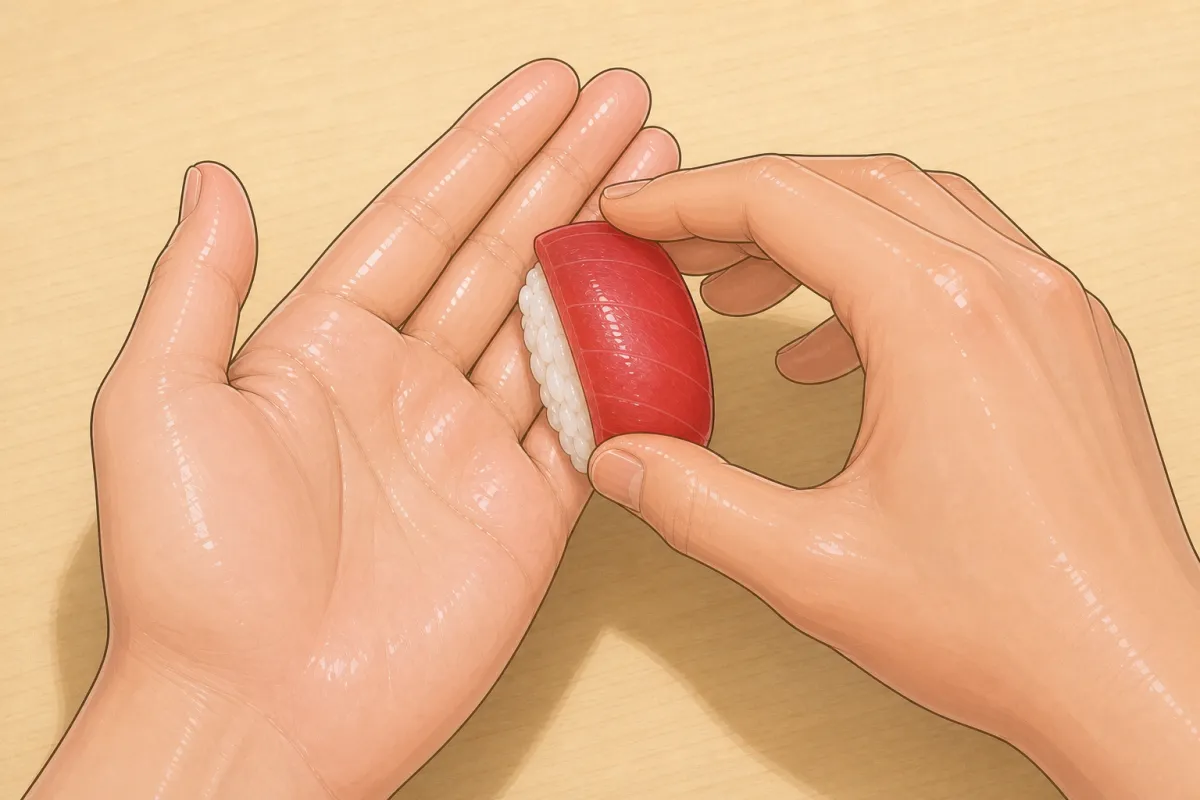
Should look like this 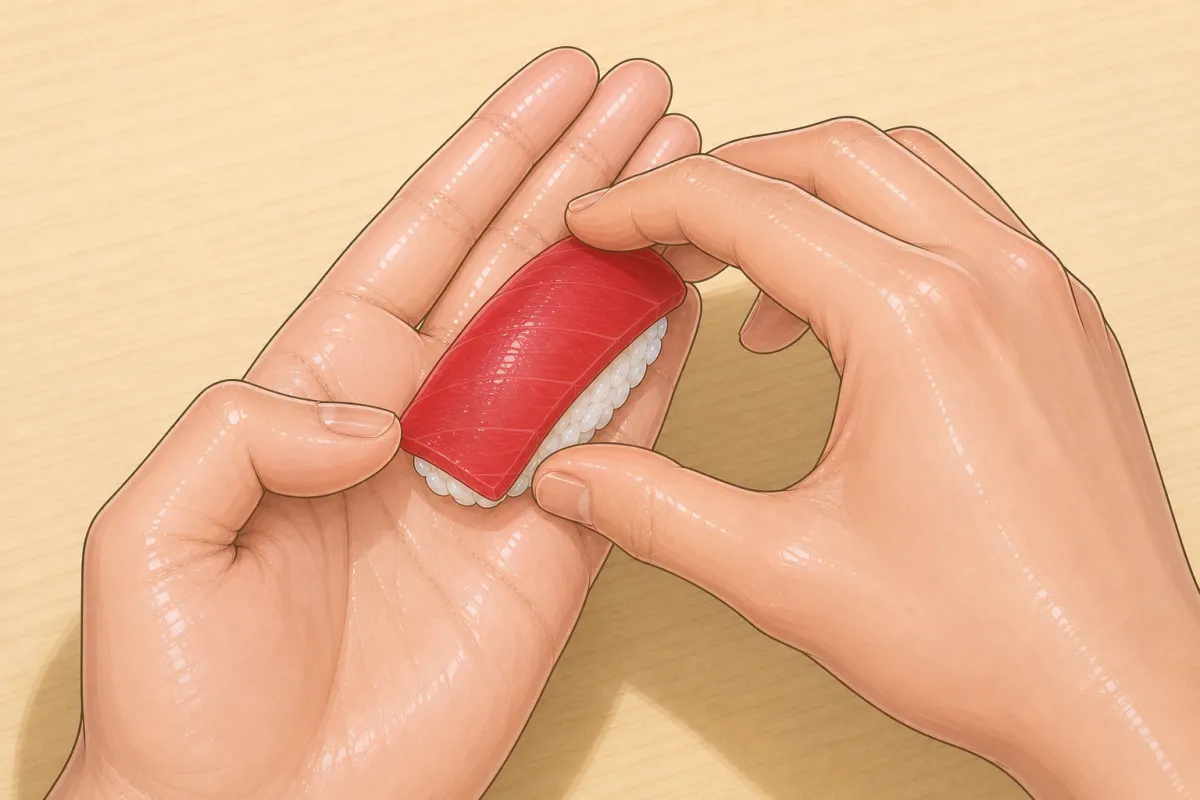
14Repeat
2 sSqueeze the long sides again (they loosen when the end is pressed), then press the other short end with the left thumb, the right fingertips only resting on top.
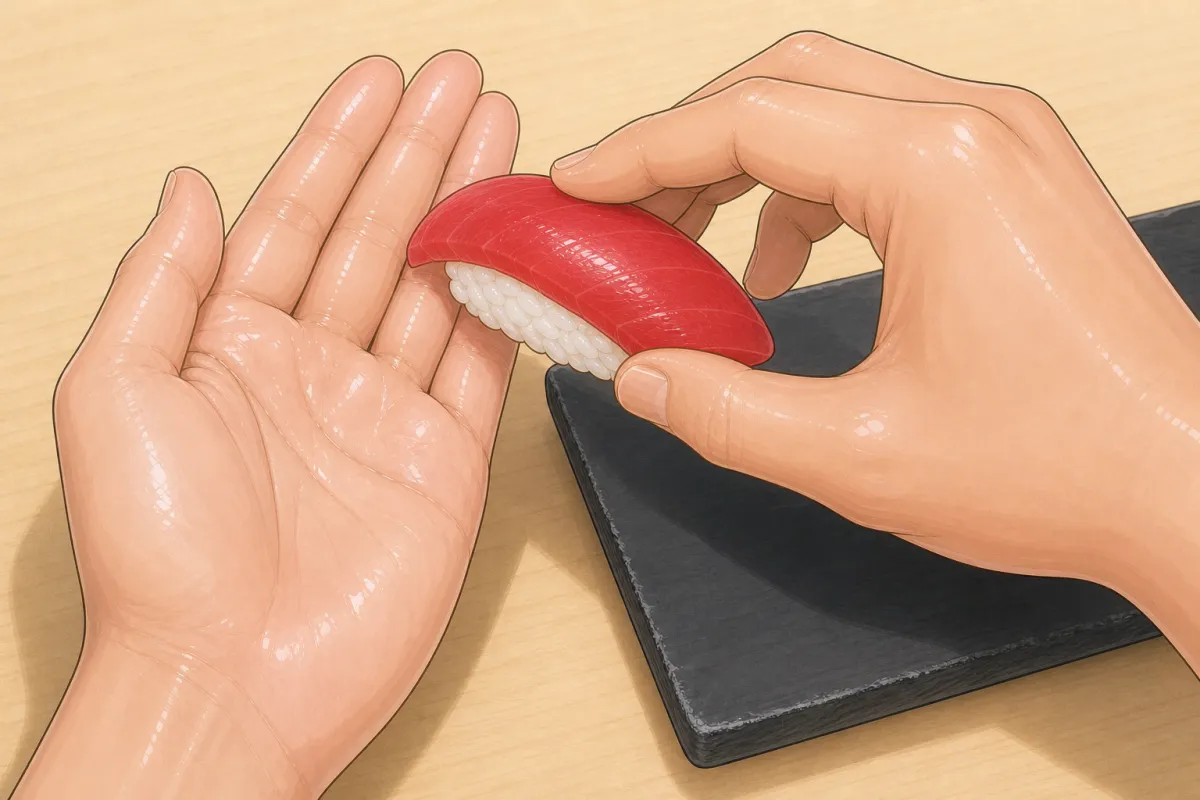
15Finish
2 s- The right thumb and index finger wrap the fish snugly over the rice at its middle.
- Lift the piece by its sides with the right hand onto the plate. From the side it looks like a boat: the fish draped over, the bottom rounded.
Tate-gaeshi — for slippery toppings
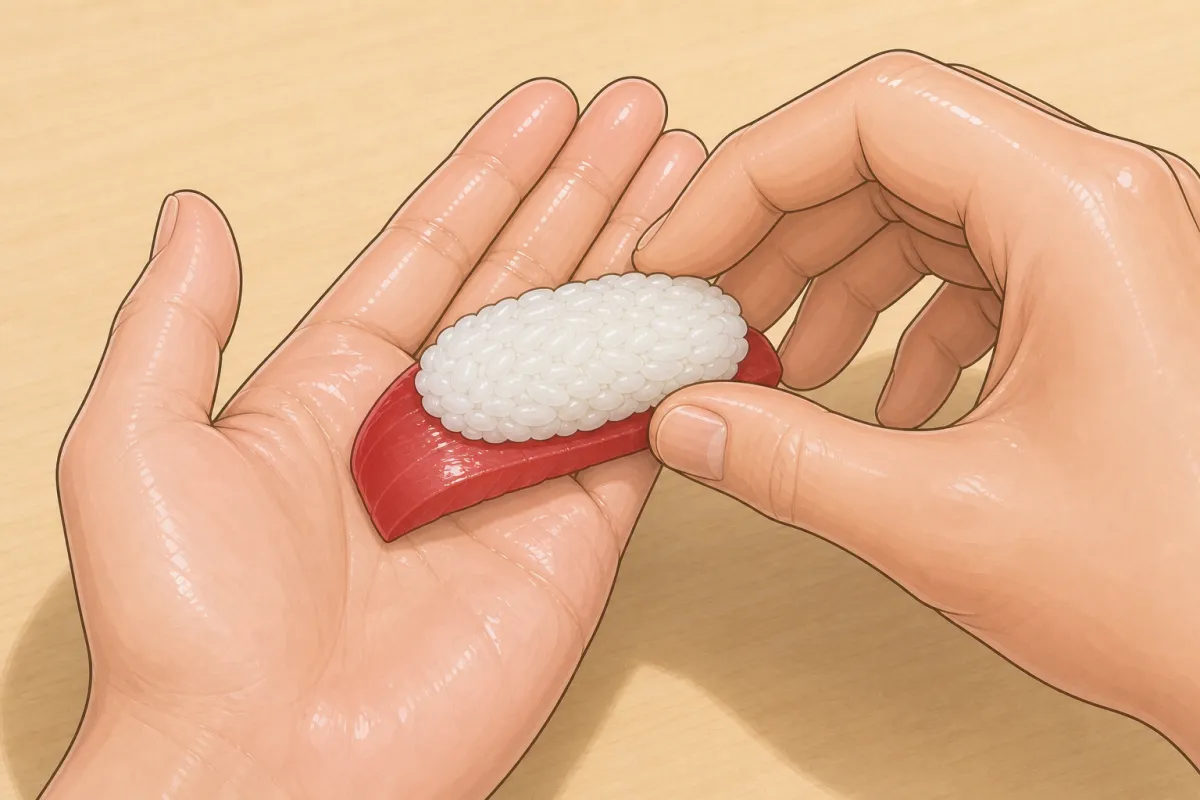
16Right hand to the edges
1 s- After the basic shape (step 8), open the right thumb and index finger to the width of the piece.
- Take hold of it by the edges where the fish meets the rice. Which pair of edges isn't stated in the sources.
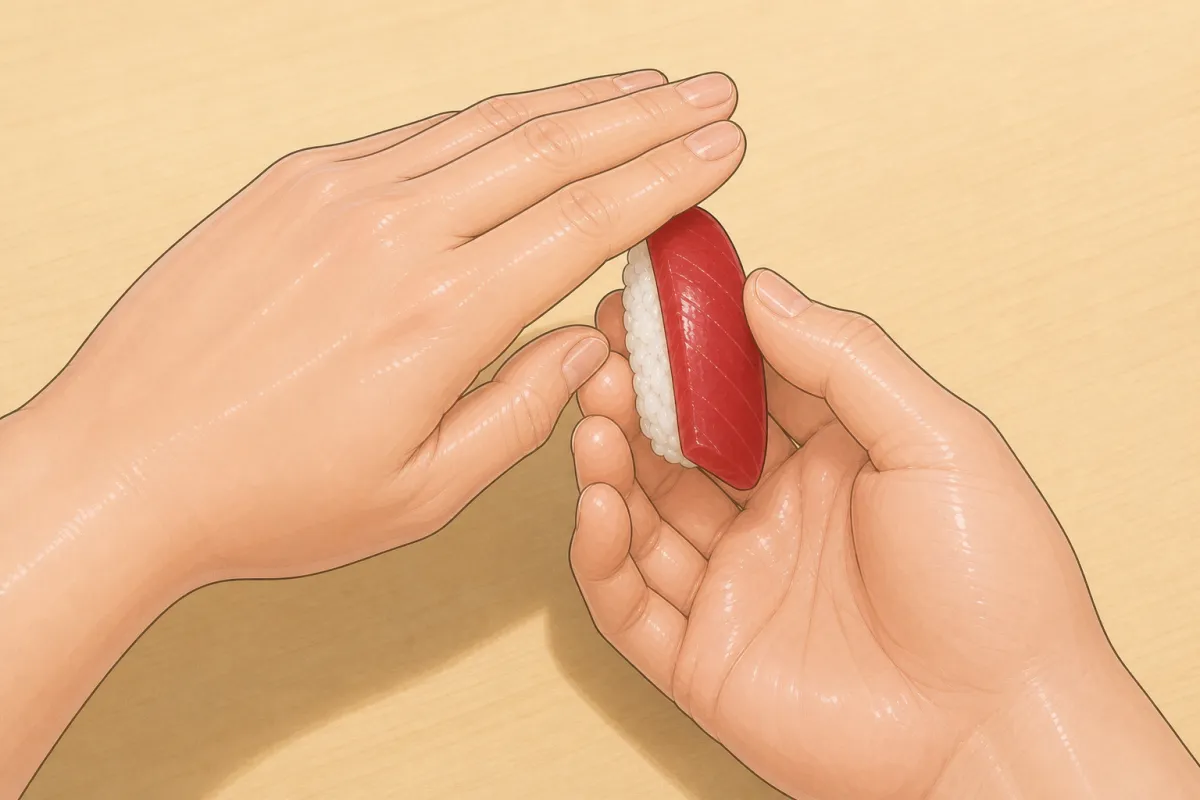
Tate-gaeshi: the left hand turns over into the right. 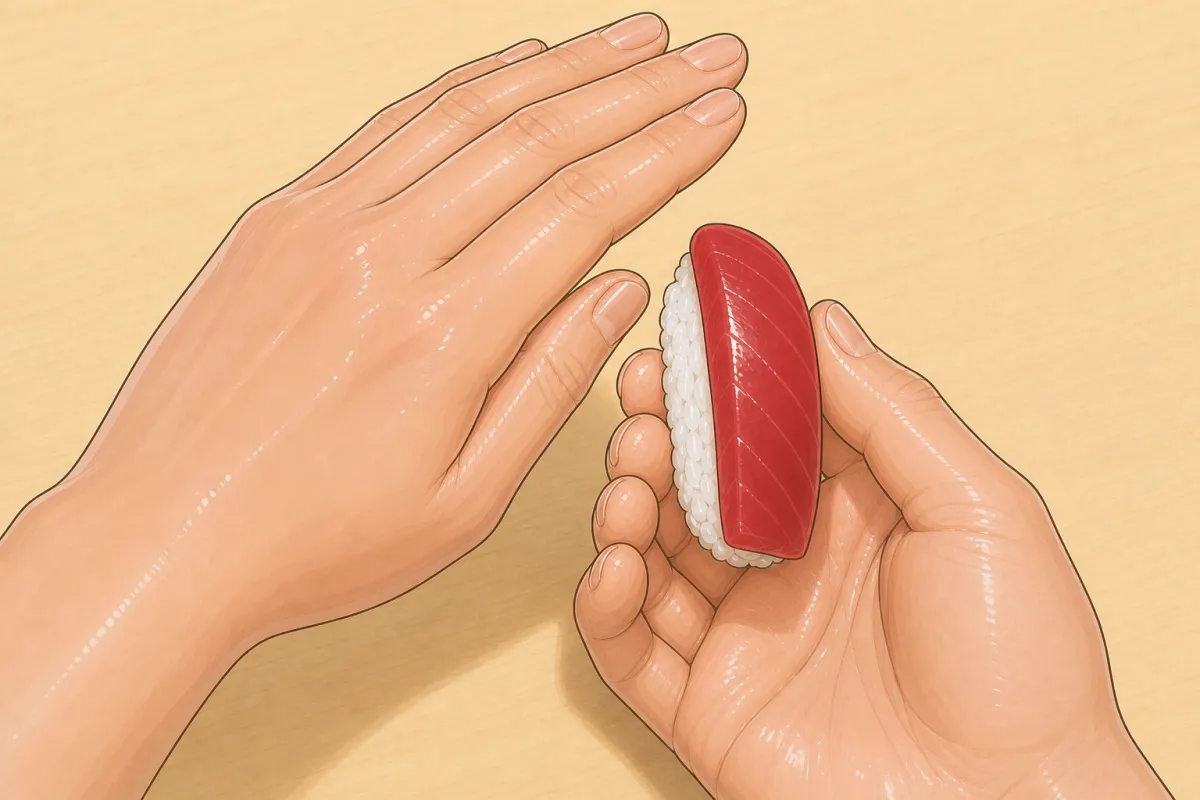
The piece stands upright, fish up, in the right hand. 17The hand-over flip
1 s- The left hand turns over, back of the hand up, laying the piece into the right hand.
- The piece now stands upright, fish up, held between the right thumb and index finger — the “vertical” in the name. The topping is barely touched, which is the point.
- Exactly how the piece itself rotates isn't described by any source.
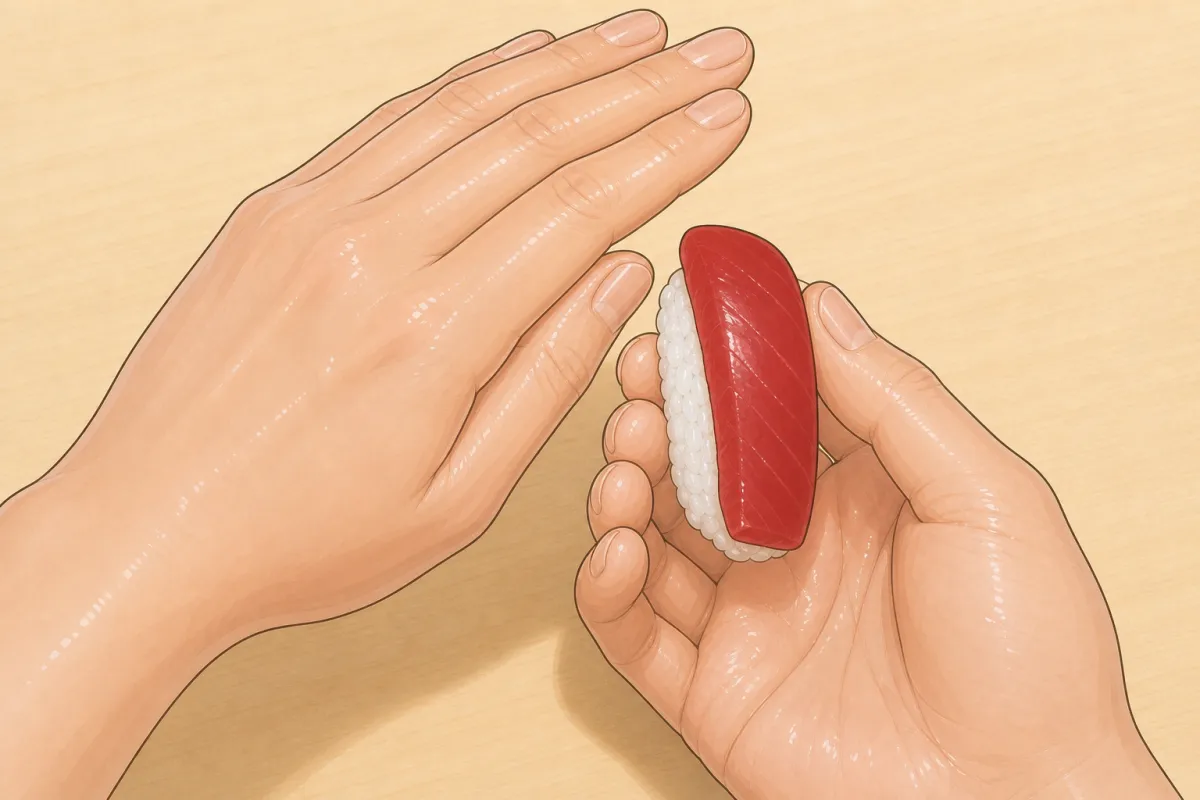
Should look like this 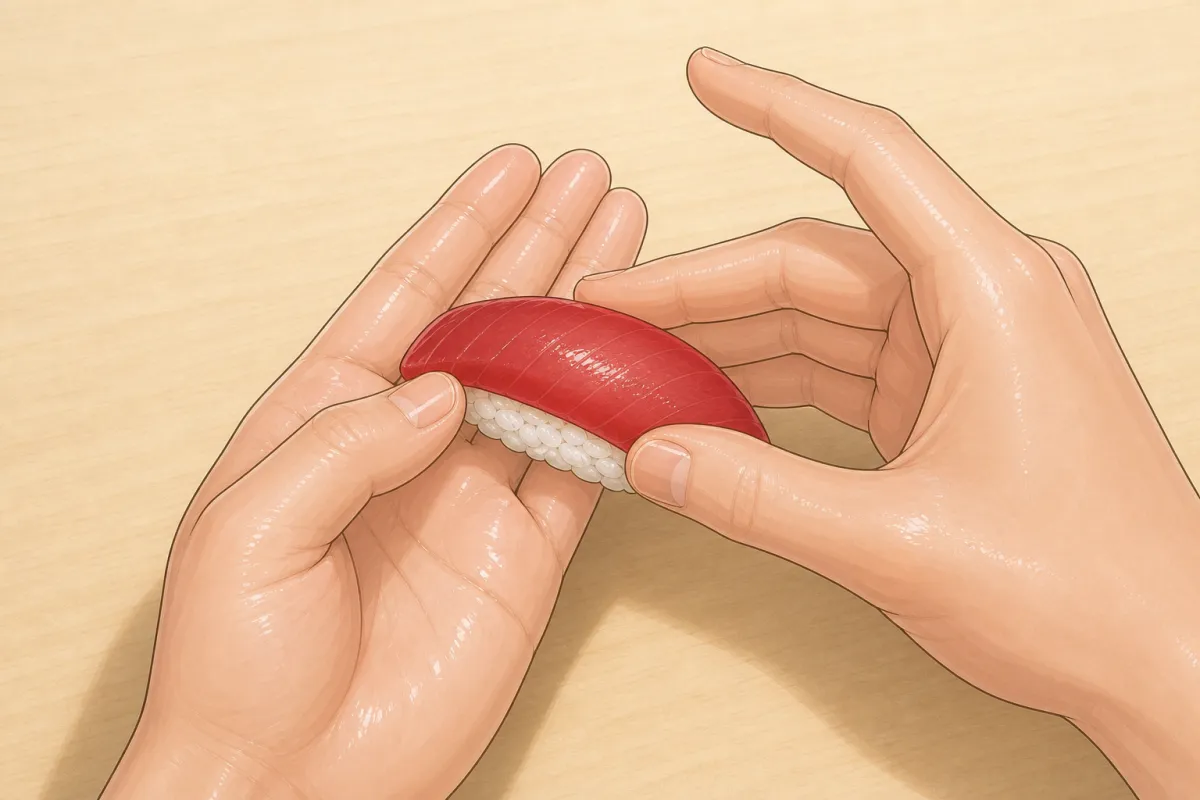
18Back to the left hand, four edges
3 sSet it back on the left fingers as it is, fish up, and squeeze all four edges as in kote-gaeshi (steps 11–14).
Hon-te-gaeshi — the old way
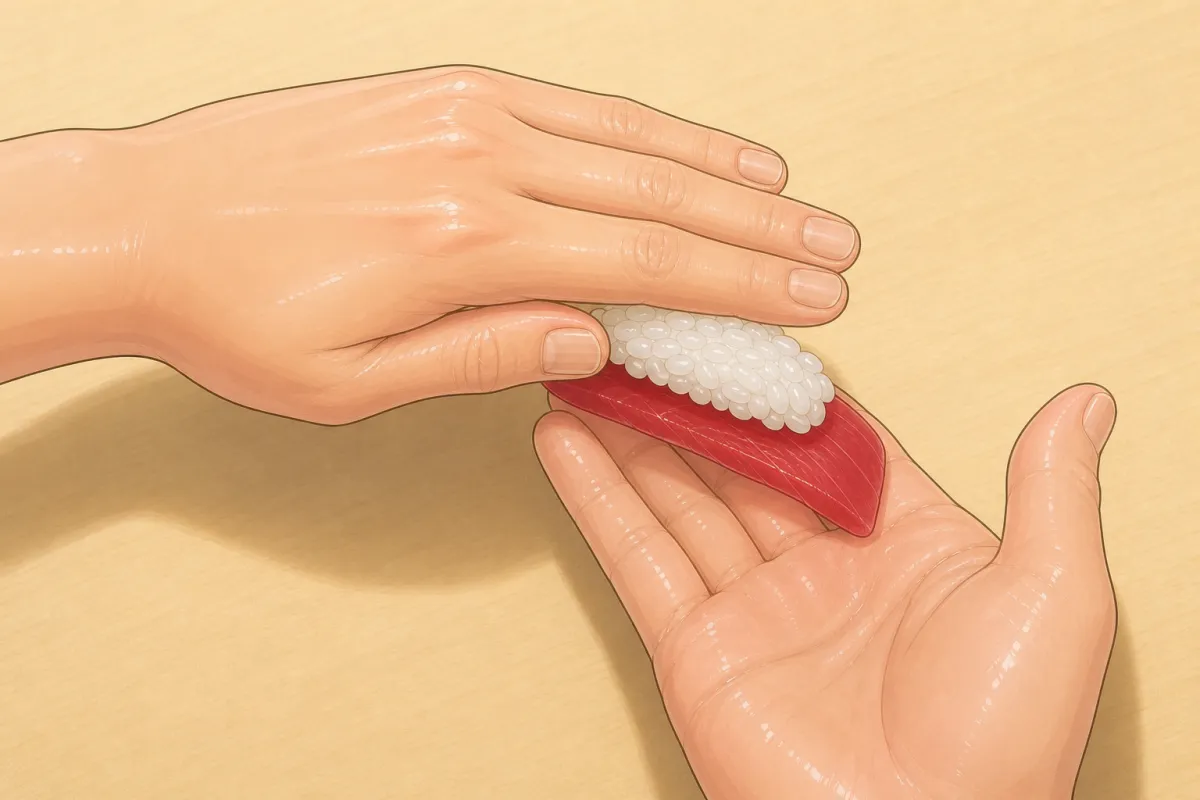
Hon-te-gaeshi: both hands turn over together. 19Both hands turn over together
1 s- After the rice is on and flattened (step 6), the right index finger presses one short end.
- The right index and middle fingers then take the piece onto the right hand, that end at the fingertips — the signature double turn.
- How each wrist rolls isn't stated; the picture shows the left palm turning down over the right palm turning up (inferred).
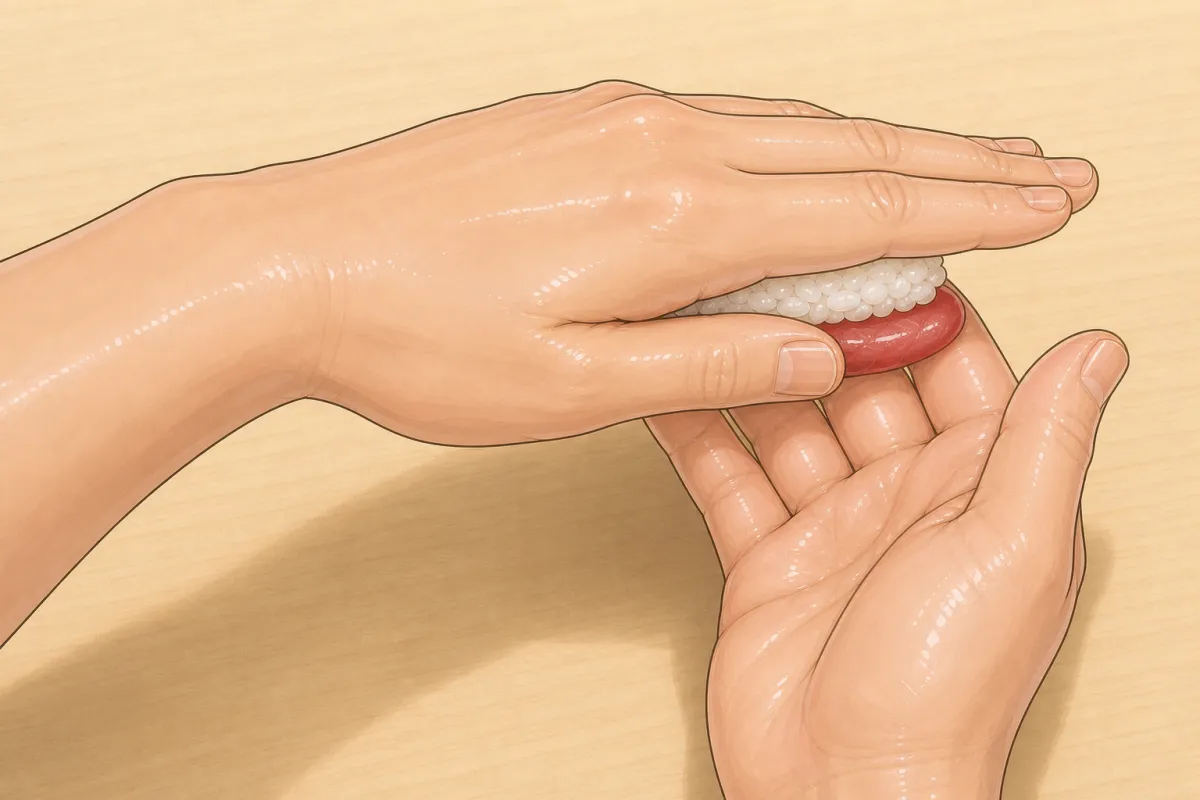
Should look like this 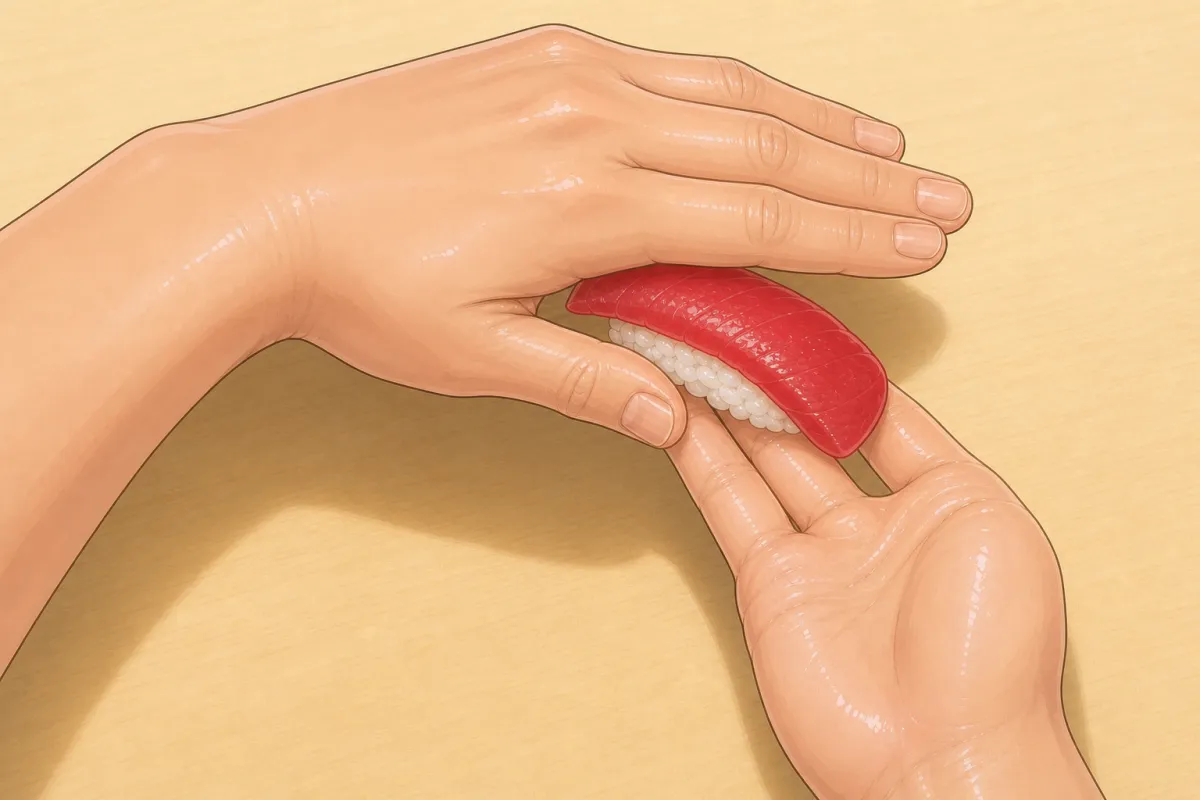
The left hand covers it and takes it back — rice up. 20Cover and swap
1 s- The left hand covers the piece from above and takes it back: the hands swap top and bottom.
- The piece lies on the left palm again, rice up, the end you pressed now at the little-finger side.
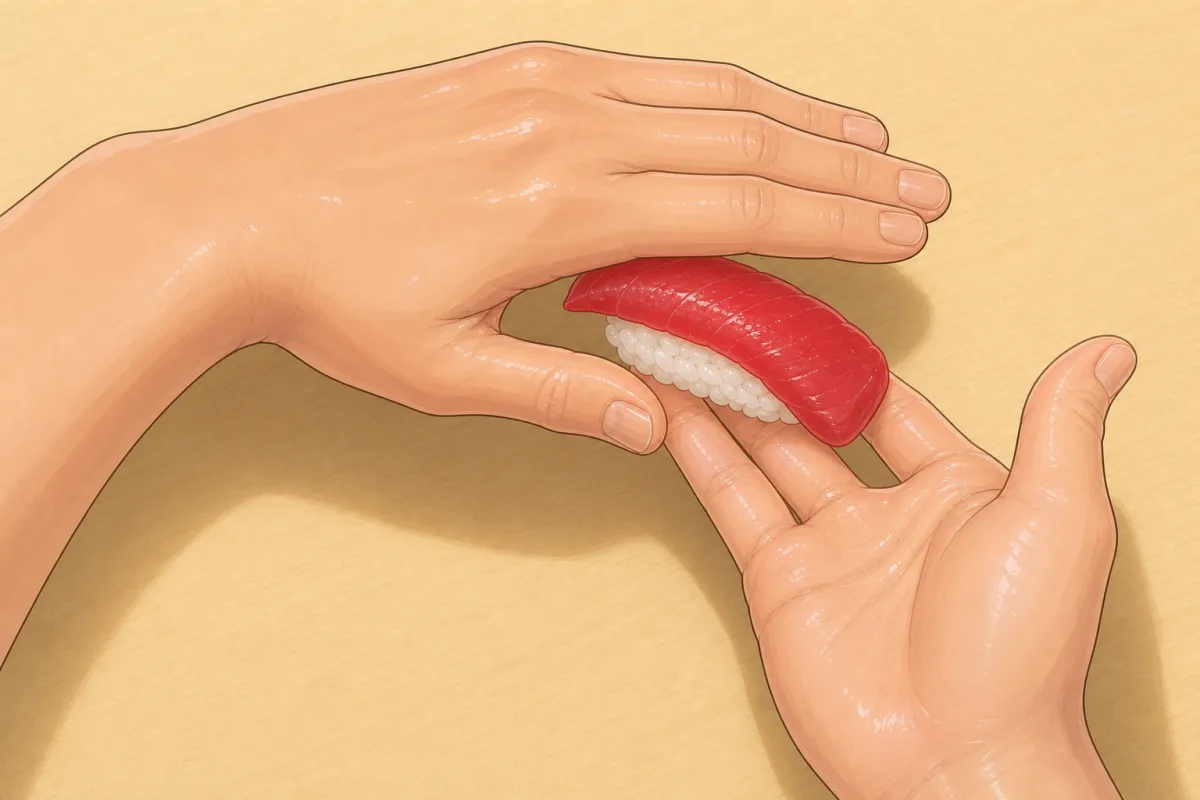
Should look like this 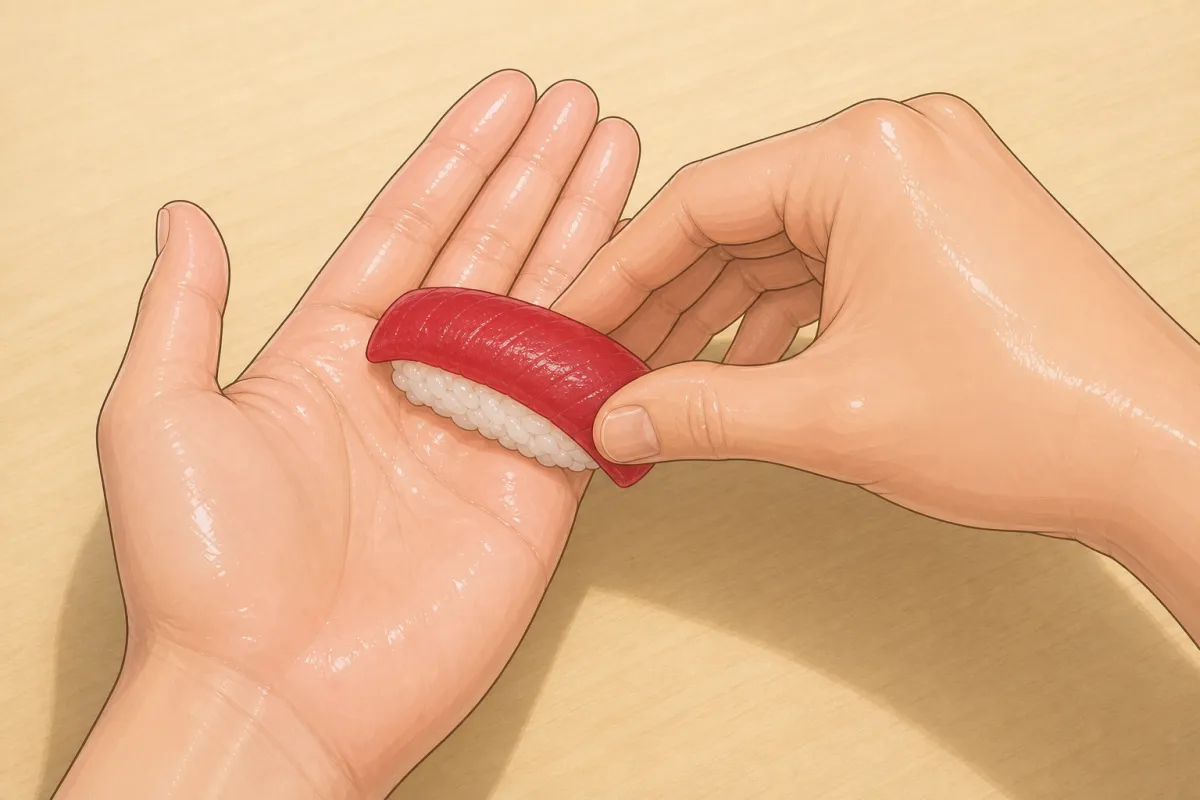
21Roll forward, press the sides
1 sRoll it forward over the left fingertips so the fish comes up (the kote-gaeshi roll), then press the long sides with the right index finger and thumb.
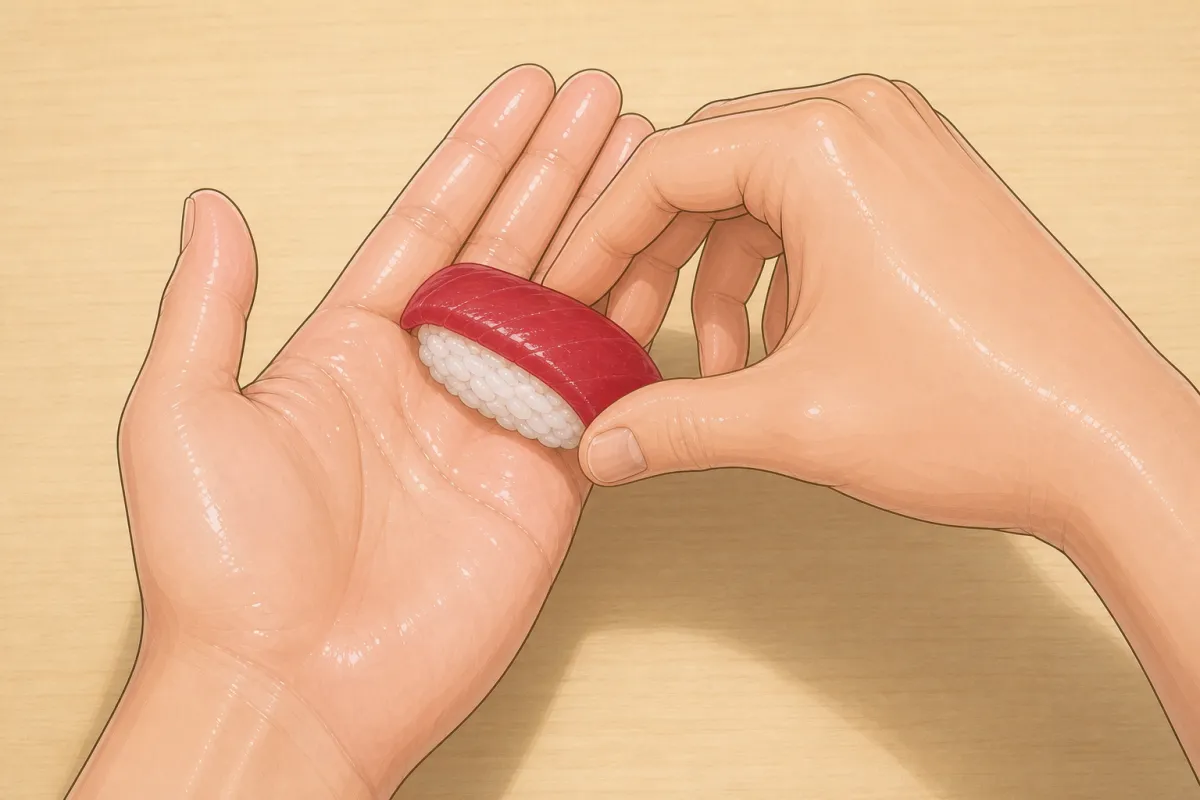
22Half-turns and finish
2 s- The right index finger and thumb turn the piece 180° clockwise; squeeze the sides again.
- A second clockwise half-turn, then close the whole hand lightly around it and a last gentle squeeze of the sides.
Serve
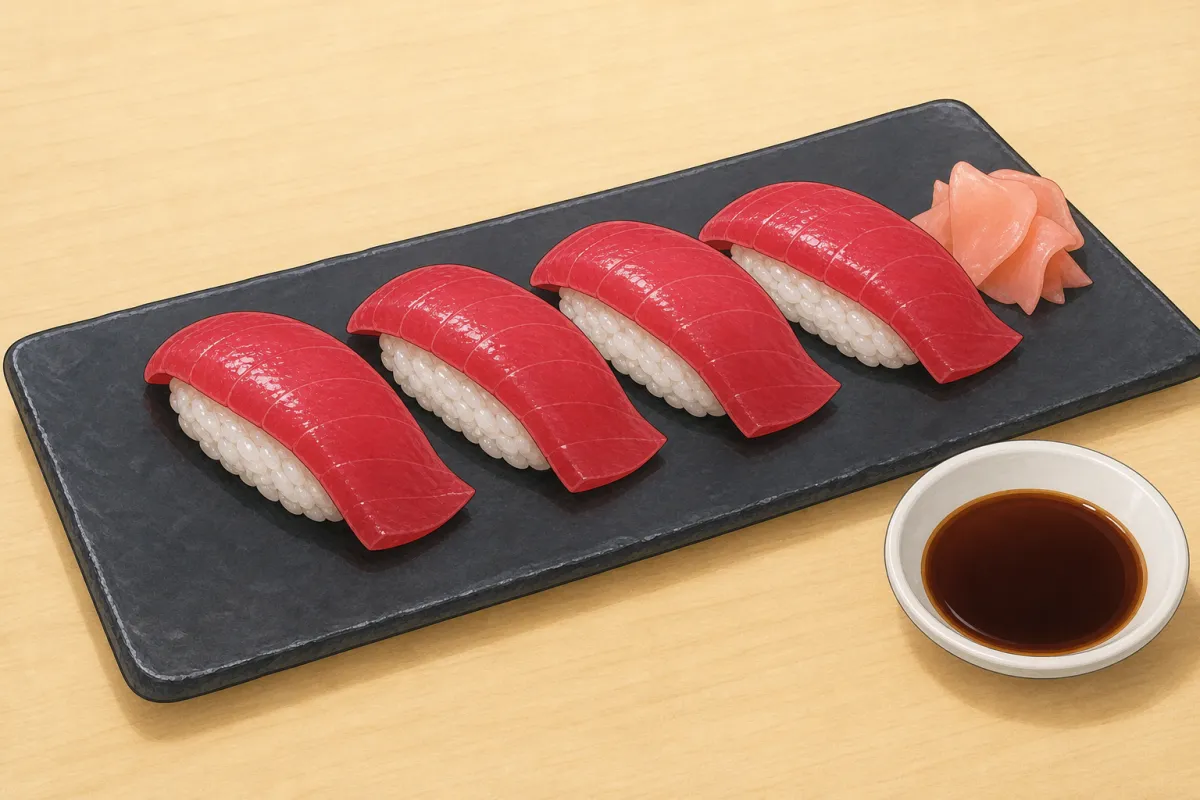
23Serve
For this step
- Soy sauceto dip
- Pickled ginger (gari)optional
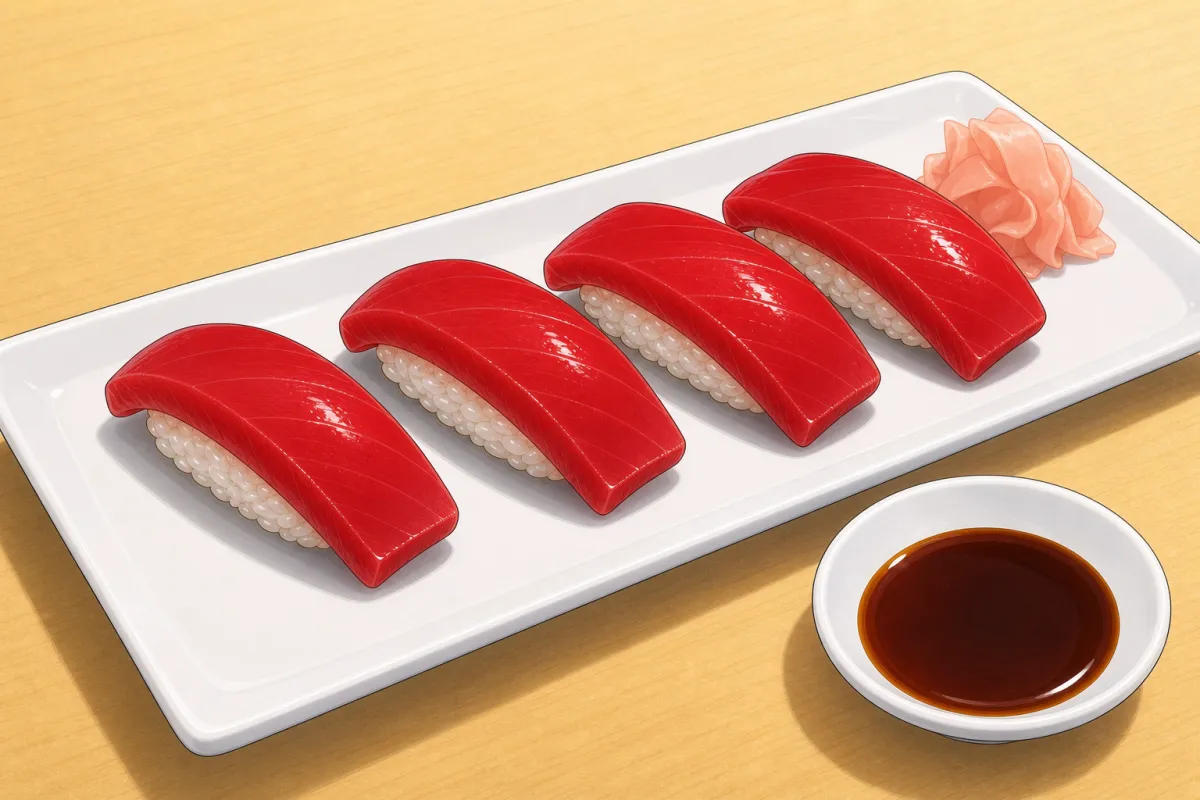
- Fish draped over the top with a little overhang, a rounded boat-shaped bottom, one bite.
- Serve straight away with soy sauce and ginger. Dip the fish side, not the rice.
Based on: Ginza Watari — kote-gaeshi, hon-te-gaeshi and tate-gaeshi explained (Japanese) · Cuisine Kingdom — Niizu Takeaki on hon-te-gaeshi (Japanese) · Golf Digest — Yoshino-zushi's nigiri, step by step (Japanese) · Zojirushi — Nigiri sushi · Sushi University — Four essential sushi hand techniques · Sushi Chefs Association Japan — Master sushi nigiri · TV Tokyo Plus — Miyako-zushi on tezu and hand movements (Japanese) · Tencho recipe — how to shape nigiri (Japanese) · Wikipedia (ja) — 握り寿司